Full Notes for the Class, taught June 22, 2024, West June Crown A.S.59
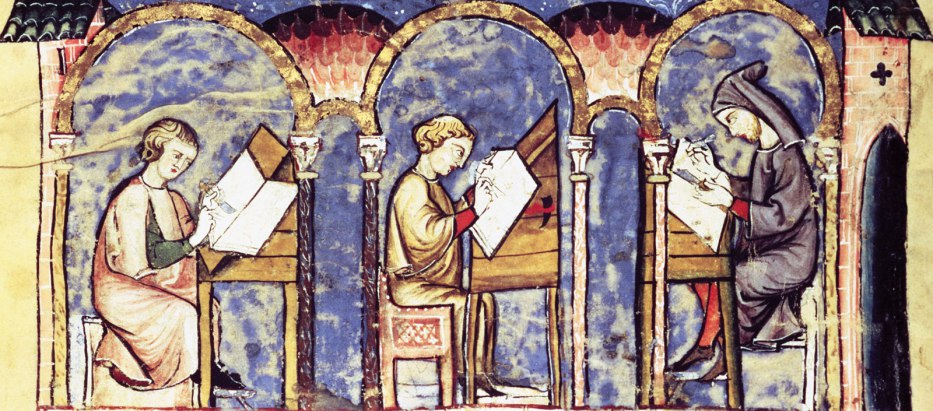 |
| From Biblioteca de San Lorenzo de El Escorial, Madrid, Spain, c. 14th century AD |
About a month ago during a conversation her (current) Highness of Oertha, Mistress Elena Verch Ryse suggested that I actually teach a class on how I do write-ups and documentation for my projects. I thought about it (getting heavily distracted from my book as I essentially gave the lecture to myself), and decided that yes, this was something I could do and would schedule for West June Crown--a fairly major stepping point for me as I have thus avoided lecture style classes and stuck with more hands on ones where I didn't have to talk as much.
The class went off with a small handful of brave souls--not as many as I would have liked, although there were two other classes going on at the same time, as well as something called "dinner". As though a meal is needed after grazing all day... Still, it was a good class and we mostly stayed on topic, with a bit of perusing my library after. These are the class notes with everything I remember discussing; while my outline has been published before on this blog, I didn't discuss my theories in depth at all. This particular class does not focus primarily on writing for competitions as most articles on the topic seam to, but more for writing to document it for your own personal gratification and to educate those who come after.
 |
| Photo by Travis Abe-Thomas. June, 2024 |
Presumably, most of you know who I am as you are on my blog, but for a general introduction as well as some disclaimers; I am Maister Bran Mac Fynin, a Costuming Laurel from the West Kingdom who specializes in period construction techniques and mens tailoring, particularly late period. As such most of my examples will be sewing related...apply your own arts filter and terms as necessary. During my SCA career thus far, I have entered very few A&S competitions (although I have run many)--perhaps a handful in the last 16 years as they usually don't line up with my project plans or inspiration doesn't strike until the night before. As such, my perspective and biases are slightly different than that of most people who write documentation; I do so as I live in Oertha and am unable to travel much, so educating outside my area is difficult--and still a "requirement" for the laurel path. So I started this blog to document and share my work.
Additionally, one of my pieces of feedback from Laurel council the year before being offered was "We want more information, and the whys of your decisions". I had previously been writing documentation of course, and attempting some brevity for ease of reading--cue spite info-dumping, and no longer curtailing my word count.
 |
| There appear to be no photos of my class, and I don't keep my phone on me at events. So have scenery from recent hikes/rides instead. |
A number of years ago (likely 2016) we had a collegium in my small barony and a laurel from Outside came up to teach: Master Bjorn Jarsalfar of Bearhaven. One of the classes I took was his How to do Great Documentation for SCA A&S Competitions (somehow, I still have the handout), and these years later it still stuck with me. What, Why, When, Where, and How. The same you learned in school for writing journalism, albeit not in the typical order.
I figure that for SCA useage,we have a few varieties of Documentation which come to mind at the moment (perhaps you have other varieties you can think of);
- Competition documentation. In this, some degree of brevity is needed, as the judges do have limited time to read multiple works. As the targeted competition goes higher up, the more you will need.
- Synopsis; A Single page synopsis of your piece for competition, which can go along with the full piece. You need to answer all the general questions. It might be good to print multiple copies, and include where the full documentation can be found for people to peruse later.
- "Blogger" style, AKA Full Infodump with Photos. This is typically what I do, as you might expect. Your goals here are slightly different as I like to educate more; if it is online, somebody may be reading it 20 years on and be inspired!
- Dress Diary; The short form content of documentation; I do not really recommend it as your main piece of docu, BUT it definitely has a place especially on social media for keeping people interested in your project (as well as getting you feedback). As you find things, progress, research, write about it. Maybe on a weekly basis if you're active enough. It can also help when you have to go back and try to remember what you did.
Tone:
The tone of your piece...I have some contrary opinions here. We've all heard or read that your documentation needs to be the equivalent of a college scientific paper, with the same style and tone requirements. I call bull. You need to stay factual, and clearly note things which are your opinions (with the why you think this!), but I feel strongly that a more casual and conversational tone serves us better. Your goals of writing are to inform, educate, and to some degree entertain. If your audience is bored, they may not finish reading and are less likely to retain information. As such...third Person Scientific writing? Not necessary. Throw out the occasional joke or humorous aside--it doesn't hurt to make your reader laugh unexpectedly, and can help cement the information in their brain. That said...I'm not saying to not use scientific method if you're running an experiment!
While avoiding dumbing or talking down in your writing, you should strike a balance between the two target audiences--someone who knows nothing or little about the subject, and experienced members in the field. Ideally, you should answer basic questions--things which you wouldn't even think about asking as you progress in your craft because it has become second nature, as well as answering those detailed questions by experts.
Use photos. When you're writing, avoid walls of text (like this article would be if I hadn't thrown in assorted photos). I like to have at least one (related) photo per section, and preferably between long paragraphs.
 |
| Random Farm on Fairview Loop |
Journaling:
One of the regular issues with SCA style documentation writing is that often we make the thing, then try to remember what we did and when. We may have even researched it first (right?!)...but did you take notes on what you did, why, and where you got the information? Keep a running journal for the project (required for any Apprentices I have!); personally I use a Word document for my A&S and divide it by year or quarterly (when I was at my peak), I'll include just what I did and when, a running log of my work time (more on that later), what needs to be done next, sources, etc. Maybe you prefer to sort it by project...whatever you prefer.
Along those lines, also get in the habit of taking photos as you work. It can be hard, especially if you are working a craft which is messy or involves time constraints (like smithing), but do your best. Not only do you need photos for your documentation, if your projects take ages you can go back and use them as reminders of what you did and the order. Many times I have gone back to Instagram or my FB page to remind myself of what I did when writing my Docu months or years later--this is a particular use of the "Dress Diary".
Keep track of the sources you /may/ use as you go! Going back and trying to figure out what sources you encountered in the initial research phase of your project while doing the writing really sucks. Nowdays, I make use of the Zotero extension; I create a folder for each project, and save my sources as I find them, hopefully with notes. And there's the that it will populate a bibliography for you from that folder when you get there.
Now onto the actual outline. I will include a clearer copy at the bottom of this lecture. Note that this is the rough outline I personally use; sometimes I move stuff around so that the reading will flow better, and not all parts may apply to your craft!
 |
| Near the top of Government Peak |
(What) The Project:
This is your introduction. Your main goals are to let the audience know what this is roughly--imagine that your readers have to match a photoless documentation (none of that here!) with the correct piece on a table with 50 other projects. What is the piece, where is it from, what does it look like?
(Why) My Goals:
What is my goal in making this project? Could be anything from experimenting with a new pattern theory to "I needed shoes because my feet are cold", or the ever popular "I saw this and thought it was neat". Why did you decide to make this, instead of something else? While ideally you want to show enthusiasm throughout your writing, this is when you want to dial it up and infect the reader with your enthusiasm for the project...even if you're sick of it by the time you're done.
Conversely, I feel it's super important to state what your goals are NOT. My goal isn't always to make a garment which is as perfectly period as I'm able; I may be testing a pattern and using cheaper fabric as a trial run, or add features which make it safer for fencing (for instance, all my late period has more points at the codpiece than is period. One has added velcro. These are to help keep a blade from getting in there). I have one piece--a Phrygian cap--which was made as a stitch sampler...the seams are what was for the competition, not a claim that the period hats were decorated that way. This is OK...just be transparent about your motives and goals.
(When and Where) The Find and Sources;
What are your sources for inspiration? Are you working from an extant piece? Discuss when and where the piece is from...if I'm working from an extant piece I love to include a map here to show where it was found--after all, how many of us have context for where this random bog in Denmark is? Note original biases--if you're working from old archaeological reports, odds are good that there are issues with them as the writers may have not known what they're talking about.
Is it different from the "norm" for the period? We all like making the funky, weird, one off pieces where there may only be one example, but you should address that it /is/ a one off and you are replicating a individual piece (or image thereof) and not a more general style. Or vice-versa, for that matter!
If your sources are from artwork, remember that a grain to bucket of salt may be needed. Stylistic biases, religious allegory, symbolism,...lack of perspective in the art..., etc all can change what the piece looks like. Filtering through common sense and experience are necessary, which requires looking at enough examples that you develop an eye for what is the most common.
The "Rule of 3" applies here; if you can find three examples of a piece from roughly the same time and place and (if in art) ideally NOT all by the same artist, odds are better it was a thing and not just a fever dream on someone's part.
 |
| Top of Government Peak, Looking down at the next valley |
(Why):
Why did these pieces exist? What drove their development (my legs were cold...)? There are some fun rabbit holes you can likely fall down here.
(Who):
Who made the piece? Would have used it? Paid for it? These might all be separate people, and probably were (I will discuss further in the "How Historically Accurate is it" section). How much would it have cost in the currency of the time? How would the person making the finished piece have obtained their materials? Did they shear the sheep...or go to the shop and purchase fabric? You may be surprised by some of the answers.
Materials:
Now we start getting out of the intro and background to the piece and into the making stuff part! What materials would have been used in the original? How do you know this? Some pieces are easy, but if you're working from an illumination as the source...how did you conclude that the piece was made of X as opposed to Y? Perhaps go into how common it was to use X for the project...or uncommon.
Then I'll go into what materials I chose to use, and again WHY. "Yes, the garment would have been made of a fulled wool in period, but I chose to use linen because I live in Virginia and don't want to die". "An appropriate looking upholstery type fabric was used because I'm not rich", "This paint is seriously toxic so I substituted X". Ideally, including your vendors is great, as your readers may be looking for something similar. For my sewing, I like to go all the way down to what threads I used for various seams.
 |
| Photo by Travis Abe-Thomas. June, 2024 |
(How!) Pattern:
What do the components of the piece look like? How did you decide on those shapes? How did you decide on the size? 1:1 scale examples almost never happen in costuming, and in the case of other crafts you may decide to change it--maybe you're challenging yourself to make a ridiculously tiny scroll in the style of X example for the personal challenge, or you change the size of the box you're documenting so it fits your feast gear better.
Would conspicuous consumption been in effect--so that the piece would clearly have a lot of waste of expensive materials? Or was there a whole lot of piecing to use every scrap of a very expensive fabric, and you can simplify the pattern a bit?
Methods of Construction;
In my case, this is largely determining what seam treatments are appropriate, and why I chose those ones. If you're woodworking, it might include your decision to use power tools for time or efficiency (which also applies to sewing, btw), or because of injury. What methods would have been used in the original? Why do you think this? For every step, you should include at least a mention of how the original piece would have been done, what you did instead, and why the difference.
When I was making reproductions of bog garments (Moselund, Dungiven) quite a bit of time was spent straining at the images available with a magnifying glass and trying to determine how they were sewn based on the impressions left by the thread.
(How) Construction:
Finally....the order of operations. This is always my most photo heavy portion of the documentation, as I essentially install the majority of the photos I took while making it, then caption each with what I am doing. As an alternative, you could put the majority of this in a separate document in order to shorten the main piece of documentation for readers so they can choose to read it or not without wearing their scrolling finger out.
Include WHY you did each thing. Why did you use this method instead of this one? Why did I sew up the back seam of the garment last (so you are handling less fabric at a time, if you were curious). Include your mistakes...they happen and are great to confess up to, both for transparency and to help other people not make the same mistake (or how you fixed it).
Conclusions:
What are your conclusions about the piece? What did you learn? Hopefully more than "sewing for 8 hours straight hurts"--sometimes it may be experimental methods and tangental things you don't think of, like my learning about the benefits of sewing tailorwise or the effects of sewing with wool thread and bone needle. This is another part where journaling as you go is super helpful.
What would I do differently next time:
If you were to make this again, what would you change? Hindsight is 20/20 and this is the chance to express it. If you had unlimited resources (time/finances/health) what would you do then?
 |
| Photo by Trisha Geiglein-Bryant. June, 2024 |
How Historically Accurate did it come out?
Honesty with yourself is important here--it is part of the learning process as well as so other people don't look at your piece and say "Mistress Thingbobbin did it this way, it must be period" when you were just testing or having fun. We are the Society for Creative Anachronism, it does have its place. When I was helping to run the Historical Sew Monthly, this was a major part of your self grading authenticity, and the Dreamstress has an article regarding it (she has recently noted that her opinions have changed somewhat since, but I feel it still brings up some interesting points). For instance, a garment made with okay but not quite period fabrics but using correct patterning and methods of construction is probably more "period" than one made with amazing fabrics but using a Butterick pattern and construction methods.
A possibly contentious opinion is the "Sheep to Shawl fallacy" of authenticity. While those projects are absolutely awe inspiring...there is a good chance it is less "authentic" than if you had purchased the fabric! Craft guilds and specialization was very much a thing in the middle ages, and this ties into what I talked about earlier regarding the "Who" of the piece. As a tailor, I would not have had anything to do with the fabric until I went to go purchase it (or the client brought it to me)...I certainly wouldn't have woven it myself!
....perhaps don't include this section on the documentation printed for competition, as you are essentially self-grading. Consult with your Laurel and/or the person running the competition (likewise whether you should include your name)... I still feel it is important to write it out as a thought and humility exercise however.
 |
| A Thing happened. Photo by Donovan Goertz June, 2024 |
Time:
How long did this piece take to make? When I'm working, I keep a stopwatch running, and pause it when I take photos, get up for more tea, or whatever. There are a few reasons to keep track of this; did you get faster? If someone wants to commission a similar piece, it gives you a possible timeline as well as factoring into the estimated price. Having an estimated value of the piece is also good to have on hand if you want to insure your work in case of theft. While we're on the subject of costs...stash materials are not free. Not even if it was given to you. Give your best guess at the current replacement value of the materials.
Also covered in this section is my estimated modern cost with and without my time. You can also dig into what it would have cost in period, and compare the cost of living to put it in context. The period cost is massive rabbit hole, and while it's valuable to include, can be a difficult and time consuming piece of research (although you can recycle it between similar projects, if you aren't jumping around periods)
 |
| Alas poor Yorik...didn't include a bibliography. Photo by Travis Abe-Thomas. June 2024 |
Bibliography:
Include it. Or else...dishonor. Dishonor on you, dishonor on your cow! What style guideline you use doesn't matter a whole lot, so long as it has the required information. Whether you include in-line citations throughout the documentation is up to you--personally, I dislike them as it breaks the flow of the reading. If your formatting allows, footnotes are great--blogging doesn't allow for it. Personally, I use a modified Chicago if assembling it manually, or MHRA if using Zotero to build it. Make sure you include the access date on webpages. Sometimes the websites change...or disappear.
(Finishing lecture notes)
If you're doing a multiple part project--such as a full suit of clothing, or if you had to make the tool you needed to do the project--give each piece their own full write-up so they all get the deserved attention to detail. Then I like to do an overview of the full project with a synopsis of the individuals and conclusions for the whole thing.
Get editors. Yes...plural. You want someone for general readability, spelling/grammar, etc, of course. Ideally this is the same person over the course of time so they learn your writing voice and the idiosyncrasies which you don't want to edit out. Ideally, your work should also be looked at by someone who doesn't know anything about the topic so they can ask those questions which you may have forgotten to address, AND an expert who can catch you if you attempt to BS something--obviously, one of these people can also do the general editing as well.
Practice! As with anything, practice makes perfect, and if the only time you write documentation is for the occasional competition, you will be less prepared when you do need to. It takes time to learn to write, as with anything, and doing so in a lower stakes environment (such as blogging) is a great way to get used to it, develop your voice and your own preferences for how you do and format things.
 |
| Photo by Travis Abe-Thomas. June 2024 |
- The Project: What the project is, where it is from. This is your introduction.
- Description of the Piece
- What does it look like? Is there anything unusual about it from the "norm"?
- Why did these exist in the first place?
- My Goals
- What my reconstructive goal is. Why did I decide to make this? Try to show why you are passionate about this project.
- What my goals are NOT.
- The find and sources: What are the primary and secondary sources your project is based on, and give the background of the source (when and where the original inspiration piece was found, etc).
- More background on the period of the project, both time period and location.
- Who; Made, paid for, and used the item. How much would it have cost in the currency of the time? Would the maker of the piece have sourced their own raw materials, or purchased them?
- Materials
- The materials used in the original.
- What materials did I use? Why those ones, and how did I differ from the original? And again, why the difference?
- Pattern
- Rough description of the pieces.
- Creating the Pattern
- How did I determine the measurements?
- Theorized period cutting layout (Completely Optional)
- Guess the width of the extant material, and how the pieces would have been cut from it. Conspicuous consumption, or thrift?
- Seams and choices, Alternately methods of construction
- Thought process for determining what seam treatments to use.
- Construction (Order of operations):. Make sure to include the reasons for each decision, especially shortcuts. I like to put many pictures here; the bulk of this section can optionally be a separate document.
- Conclusions and what I learned: This is another part where keeping a journal is important--hopefully you learn things throughout the project.
- What I would do differently next time.: If you do this again, what would you do differently? What changes would you make if you had unlimited finances/time?
- How HA did the project come out?
- Time: Exactly that--how long it took to make. I also like to include the value of the piece, ideally in both modern and period costs (how does that compare to the baseline cost in the first portion?).
- Bibliography: Include your citations here....
© John Frey, 2024. The Author of this work retains full copyright for this material. Permission is granted to make and distribute verbatim copies of this document for non-commercial private research or educational purposes provided the copyright notice and this permission notice are preserved on all copies.
Photos by, variously; Khevron, Trisha, or were taken by Twobears on Megan's camera (doublet photos). The scenery ones are by me.
No comments:
Post a Comment