
Last year, I put together my first pair of Norse shoes--ugly things, and can be found HERE. This time, I used a somewhat different pattern, attempting (unsuccessfully) to base them on the Staraya Ladoga pair, as well as making them much closer fitting (the last pair was made to wear with many socks), and in better leather.
So, this project is a fairly generic pair of Norse shoes, made for warm weather and Summer wear.
 |
| Staraya Ladoga shoe sketch. Supposedly from
Swann, June, History
of Footwear in Norway, Sweden and Finland,
Kungl. Vitterhets Historie och Antikvitets Akademien, 2001
|
Description:
This particular pair is a low boot, coming to above the ankle, and is based on the Staraya Ladoga pair; these have the uppers wrapping around, seamed over the instep, and fastening vertically somewhere around the ankle. As is the norm for Norse shoes, the sole has a triangular heel extension which is inset into the upper; this provides support to the upper, as well as extra durability in a heavily worn area.
 |
| Footwear display at Haithabu Museum. Source |
When I decided to make another pair, in good leather, my goal was to make the Staraya Ladoga pair. However, my shoemaking skills are not at that level yet, so this is essentially a practice piece. Therefore, my primary goal was to have nicer pair of relatively generic shoes to wear at event when bare feet aren't appropriate (I know...apparently they aren't at times...), while refining my patterning and shoemaking skills.
As for the eventual goal of making the Staraya Ladoga pair, they are from the same time and place as my unofficial persona, somewhat decorative, and--most importantly--no one up here has a pair.
Pattern:
This is a three piece shoe, consisting of the sole, an upper to cover the top of the foot, and the upper that wraps around the heel and ankle. The piece which overs the ankles has a triangular cutout to accept the heel wedge.

Materials:
My chosen materials were fairly simple....leather, of course. Veg-tan leather, in particular, since it is both a period method of tanning, and easy to work. 3-4oz (weighed per square foot) leather was used for the uppers on this project; with consideration I had decided that it would be light enough to be flexible but heavy enough for durability, and a versatile weight (a major consideration for the purchase). The sole is a much heavier 14oz sole leather, for durability.
Seams:
When leatherworking, in general, you want the seams to be as low profile as possible--both to prevent friction and discomfort, and in order to not waste material in a seam. Therefore, a flesh side (to hide it) butted seam was used for the construction of the uppers. This was sewn in Londonderry, 50/3 linen thread for authenticity.
On the sole, however, I chose to use artificial sinew. This is a seam which is under a fair amount of strain, and gets exposed to quite a bit of moisture and grit--which means that linen thread used in the area tends to wear out fairly quickly. The sinew was used because I don't care to spend a lot of my time tediously repairing my shoes. A skin/edge stitch--where the stitch goes in the skin side of the sole leather, out the edge, and through the seam allowance of the upper--was used to attach the upper to the sole.
Both seam types were done with a double running stitch, where you sew the seam with a running stitch, then go back over it again with alternating stitches. I chose this over a saddle stitch (a running stitch variant with a needle on each end of the thread) for ease, since I was not awling all the holes. See the pertinent section (on Stitches and Seams) of Footwear of the Middle Ages for diagrams.
Drafting:
I knew what I wanted the pattern to actually look like, based on the Staraya Ladoga pair sketch well above. Except I really don't quite understand it....so I believe I....improvised. The sole was made with the standard tracing method (putting your weight on it) and extending the heel; the upper was made by the (also standard) method of measuring over the top of the instep, measuring a line that width, then rotating the sole around the toe and tracing the outer edges of that. Unfortunately, I cannot remember how I made my first draft of the rest of the shoe--I didn't note it in my journal. I suspect, however, that it was primarily via draping in my patterning material (acrylic felt).
It took two trials this time, plus a modification after I sewed the instep up for the first time.
Construction:

This photo is of the second shoe--originally, that steep curve was not there and I got an unsightly bulge at that spot.
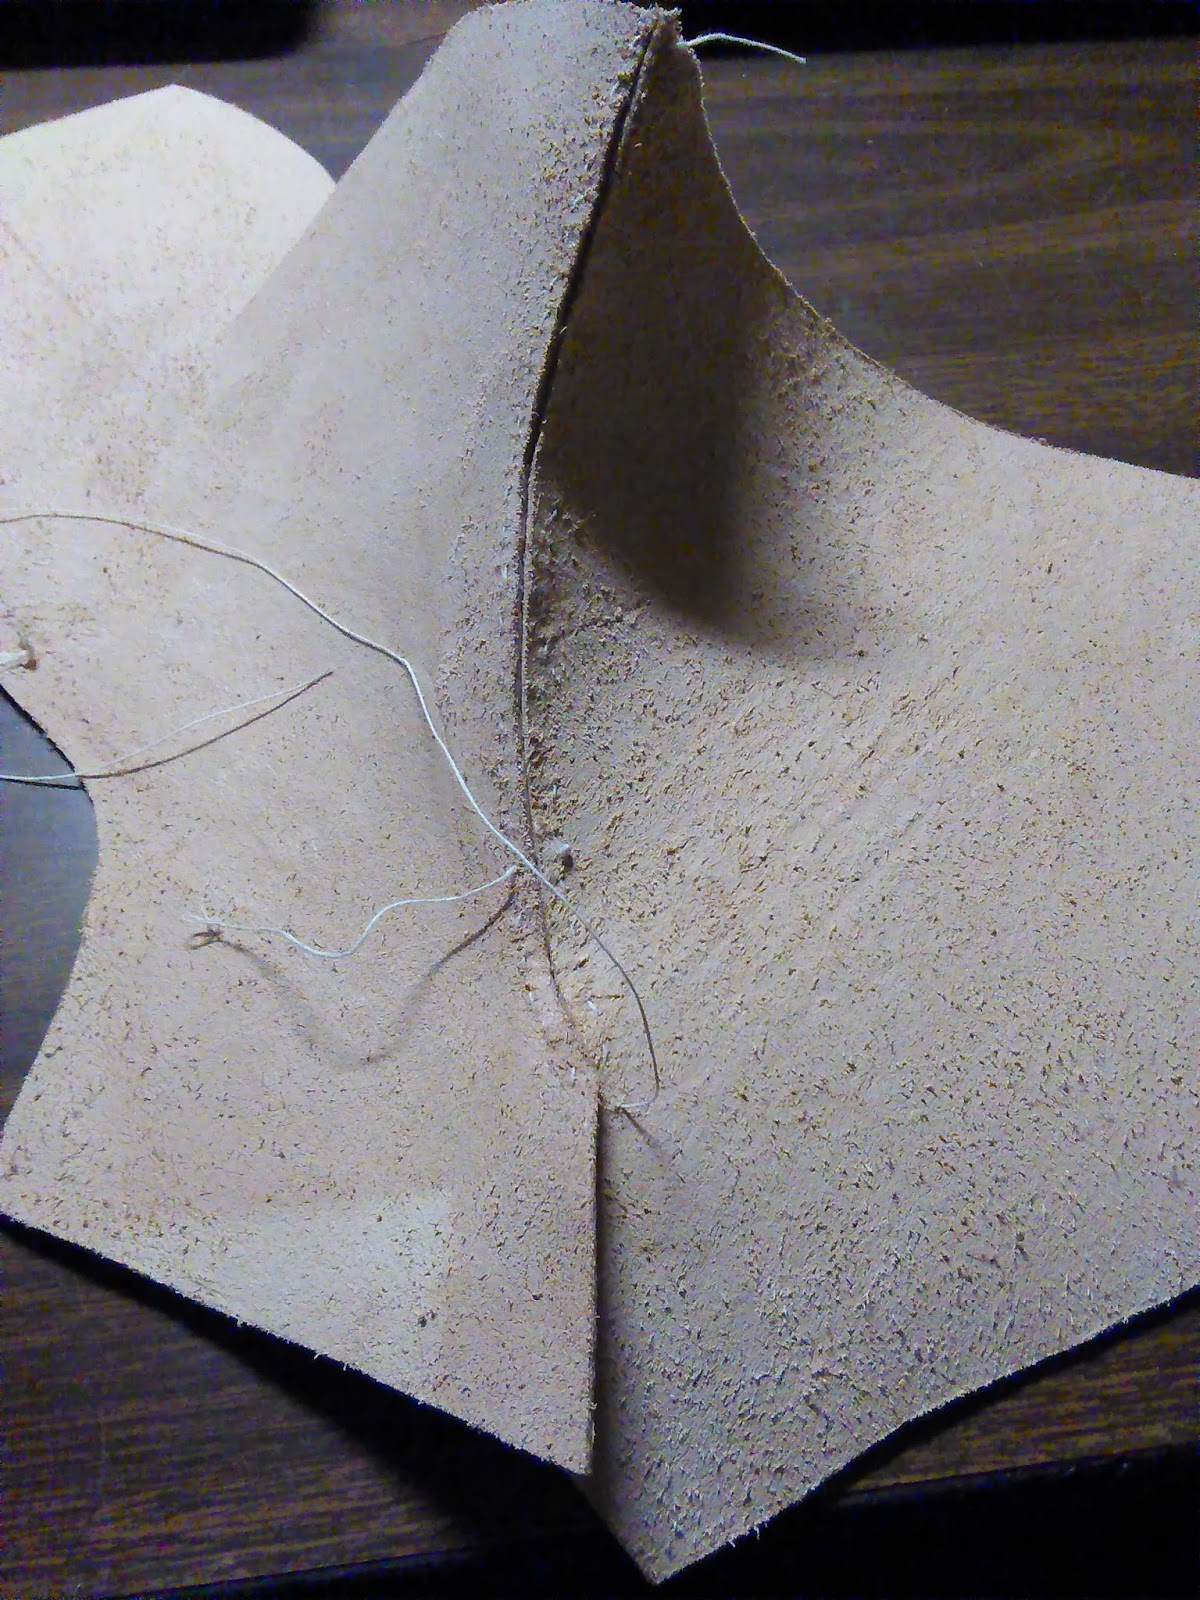


The holes for the stitching are on the other side; these were made with an awl, and the distance between stitches was eyeballed.


I eyeballed the proportions, and warmed the shoes in a 200* oven between applications; that way the wax could penetrate. You can see that it is decidedly uneven--the extra dark patches are where I poured the molten paste wax inside the shoe--it penetrated much better from that angle, and I will likely redo them at some point.
What I Learned:
Well, last time I made a pair of shoes, I used far too much ease....this time, I used too little, and the shoes are slightly too small--can't get them on with a pair of socks. But since they are more for indoor and summer wear, that isn't too much of an actual issue. Something that could have been an issue (but thankfully wasn't really) is that I should have arranged the pieces so that the grain of the leather ran the length of the shoe--theoretically, that would add a bit more stretch over the instep; as said, not as important in this case, but it's a good thing I was reminded of this before I start my next leather project....thigh high boots.
In addition, I once again was reminded that I don't think that Viking age shoemakers actually used patterns, but draped the leather on the last in order to make the best use of the material. This is based at least in part on that no two are even particularly close in pattern, plus that piecing wasn't uncommon.
Like I said above, in future pairs, I would give myself a little more ease over the top--particularly at the front opening, and probably go with a different pattern (maybe center opening, with a center seam). I would hope that the next pair I make I am happy enough with the pattern to embroider in red wool. I would also make sure to fully stuff the shoe to begin with.
How Accurate is it:
Well, the leather is as close to correct as is really possible, as are the methods of construction. The pattern is theoretically correct--even though it's not a duplicate of a surviving shoe, it shares characteristics with them. Seams and construction are correct, as is the use of linen thread; obviously the artificial sinew is not period--linen thread should have been used--but I made that choice for the reasons discussed in that section. I would say maybe 80% accurate.
The Challenge: Protection. Fairly obvious--the shoes are to protect my socks from wear and tear ;)
Material: Leather
Pattern: My own, based on period ones
Year: Oh...tenth century or so.
Notions: None.
How historically accurate is it?. 80% or so? The materials and pattern are fine, other than the use of artificial sinew to attach the sole.
Hours to complete: 10:30 or so. I didn't keep track of how long it took to stuff them.
First worn: Just to break them in.
Total cost: Not actually much. Probably only a few dollars--I paid 60$ for the half hide (18-20 square feet).
Bibliography:
Carlson, Marc. Footwear of the Middle Ages. http://www.personal.utulsa.edu/~marc-carlson/shoe/SHOEHOM2.HTM. [Accessed 3-28-16]
© John Frey, 2016. The Author of this work retains full copyright for this material. Permission is granted to make and distribute verbatim copies of this document for non-commercial private research or educational purposes provided the copyright notice and this permission notice are preserved on all copies. Photographs of my work may not be duplicated.
Thigh-high boots for the next project? wow! ambitious!
ReplyDeleteOddly, I suspect that they will be easier to pattern than these--they have essentially the same pattern as hosen.
Delete