 |
| Mark II. It was (obviously) much warmer this time. |
 |
| You are correct in believing the hat is not period--however, it was bloody cold out. |
The Find:
The Dungiven find consisted of a pair of trius (the Irish trousers), a jacket, and a brat (Irish variation of a cloak) dug up by a farmer on April 23, 1956. There were several other pieces found as well as the major ones—a pair of Lucas Type 5 [Henshall, pp. 135] shoes (sewn with wool thread, interestingly enough), and fragments of a belt that was found in the waistband of the trius. No skeleton or body was found with the clothing, which is not unusual given the acidity of the soil. The pieces were found slightly North of Dungiven, Co. Derry, North Ireland (the tiny red dot on the map). One of the somewhat interesting things about the garment(s) is that we do not actually know what period they are from—it is estimated based on shape that the jacket could have been make any time between 1570 and the 1640s.

Description of the Garment
The Dungiven Jacket is a doublet of approximately waist length, longer in the front, with doubled skirts. The sleeves are full length and then some, with a sewn on cuff and two buttons. The skirts aren’t particularly long or full—although longer in front than in the back—and are in two layers, with the top skirt about half as long as the bottom skirt. I did try to get more recent information on the Dungiven Jacket; however, the Ulster museum did not return my emails in time for this project.
Fascinatingly, there are no side or back seams to the body of the doublet—it is far more common for there to be side seams to aid in fitting, even if the back is one piece. Since there are no side seams, the armcyes are cut out of the fabric, with the top portion left in place as shoulder wings. There is a gusset set into the center back to widen it over the hips. Because this particular garment isn’t fitted, and the construction is somewhat rough, it is usually considered to be a cottage made jacket.
The entire garment is decorated with woolen piping sewn into the shoulder, and collar seams. This piping (much like the hemmed edges of the skirts and the shoulder wings) is cut on the bias every ¾ inch or so. There are the remains of 18 or 19 buttons down the front, but only 16 buttonholes—the theory is that the extra buttons (which are clustered around waist level) may have secured a belt. [Henshall pp. 123]
 |
| Sketch of the garment from The Dungiven Costume |
The Cloth:
The garment is made of a woolen 2/2 twill of Z spun yarn, and has a raised nap where the original cloth was protected from wear. The colour is now a dark brown (Bog Trash Brown[i]). That is to say, the original fabric is—over the course of years of hard wear the entire garment has been extensively patched, both inside and out. The patching (of the doublet) is in 12 different woolen fabrics, of varying weights and weaves; all—of course—are now brown, but three of them do have signs of a pattern. Some of the cloths reoccur as patches on the trius and brat.
In addition to the patches, the garment was lined and faced fairly early in its life, with pieces covering the back and each side. I would presume this was for warmth, as some of the pieces were quite large (the piece lining the back, for instance, is over a foot wide).
 |
| from The Dungiven Costume |
My Goals
I chose this project as my Queen’s Artisan project in part because it was on my planned garments list, and is a perfect example of my chosen craft—recreating extant…plain…clothing. When I undertook the project, my goal was to get as close as I could to the Dungiven Jacket when it was new. Other than using a fabric from my stash which is as close to the original as possible—this meant handsewing with wool thread (the extant was sewn with wool thread similar to that of the cloth). The proportions and all inaccuracies in the cutting are replicated via from my scaling of the original measurements. Part of recreating this piece—as a cottage made garment—was to replicate the roughness; in other words, I am not striving for the precision in fit or stitching which is the hallmark of more modern sewing or court garments.
In addition to the above, I have a longer term goal—I want to study the wear patterns of the garment and fully intend to patch it with a variety of woolen fabrics over time.
The Pattern
The garment consists of one body piece, two sleeves (each with a sewn on cuff), a collar of three pieces, and a four piece skirt. The body is cut with the selvage of the cloth forming the (unshaped) shoulder seams, and could have been a straight piece cut from the width of the fabric, with a curved bottom edge removed (the doublet is shorter in the center back). There is a roughly triangular piece inset into the back—which is actually set in slightly off center, and I am not sure why this is so. Even without measuring, you can fold the fabric in half to find the center.
 |
| from The Dungiven Costume |
The collar consists of either three roughly trapezoidal pieces, or one piece with notches cut almost all the way through. I chose to interpret as the first option because the piping on the collar is a continuation of that on the shoulder—it is common for 16th century doublets to have the back of the collar be cut in one with the back. While this isn’t the case here, I chose to treat it so, and apply the collar in the three pieces.
Each of the four skirts is roughly an extremely shallow ‘C’ shape. The top edge is on the straight of grain, with diagonally cut and pointed “verticals”, and a slightly curved bottom. They are deeper in the front than in the back.
The sleeves, on the other hand were rather difficult, due to their condition—one is missing entirely. In the end I decided to go with a simple straight and fairly narrow sleeve, per Henshall’s hypothesis [Henshall pp. 123[ii])—the diameter was pretty much the minimum to fit over my fencing shirt sleeve and allow movement. A rough shape was given for the sleeve cap, and I followed that. The sleeve cap is more or less a simple curve—not an “s” cap, even if the seam runs up the back of the arm.
Materials
I chose a medium/heavy weight wool for my reconstruction. It is a simple 2/2 twill in a dark, slightly rusty brown. It may be a similar weight to the extant fabric, but it is a finer weave—it has more threads per inch in both directions than the original cloth.
The thread is a bit more difficult; it calls for a lightly or two plied thread similar to that in the fabric. Being as plying the thread would have ended up being too thick to sew with, I decided to use self thread—pulled from the warp of the cloth and used without plying. I more or less admitted my madness when I started using unplied woolen thread for sewing. The only point I used something other than the self thread was in making the buttons (where I used brown dyed linen thread).
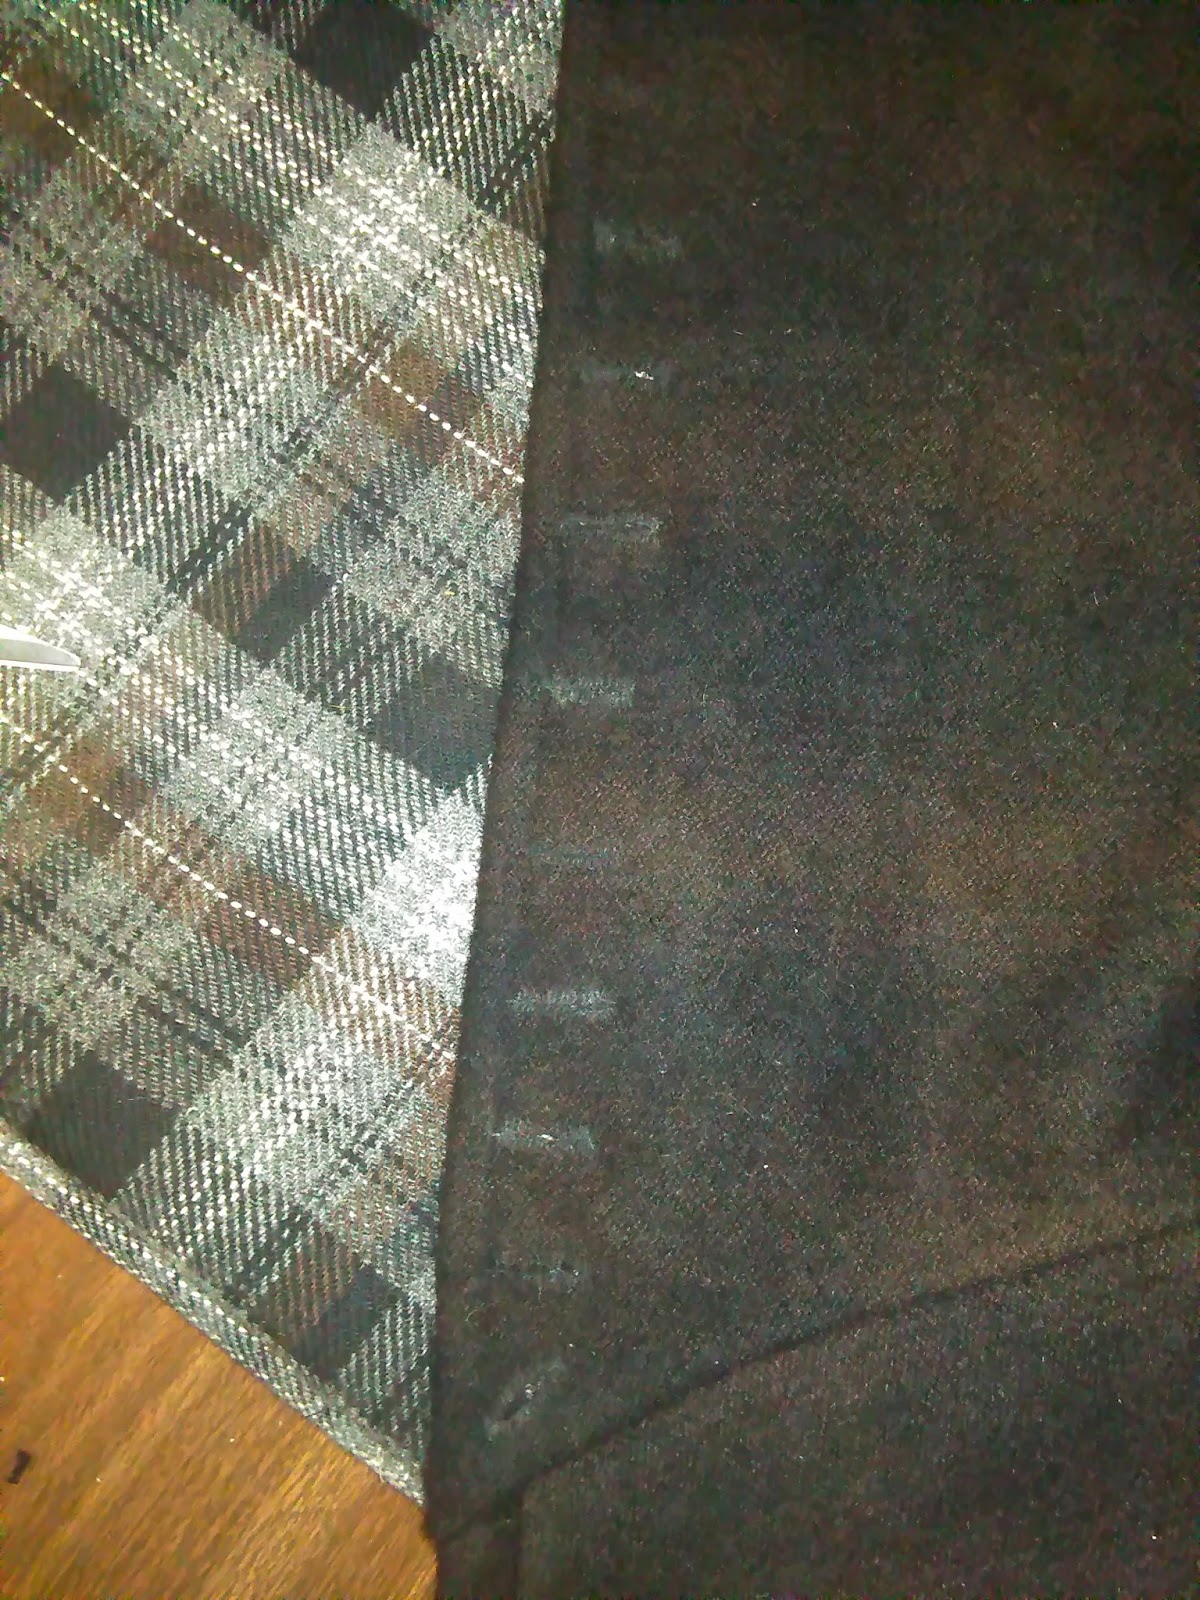
In my remake of the garment, I ended up using a(n extremely) heavy, heavily fulled, black wool with dark brown stripes; later examination (it required a photograph of the material) showed that it is what is apparently called a "shadow plaid"....you can't see the widthwise stripes unless the light is just right. The wool is also more tightly woven than that of the original, with 20-25 threads per inch in both warp and weft; each thread appears to be double plied. The fabric was chosen because it was the best option I could find for a reasonable price; the first wool I purchased for the remake was far too loose and fluffy, and I had a devil of a time finding a fairly dense wool in a colour I liked (since I wanted a brown, preferably a material as close to the one I used for the first version as possible).
This time around I decided to use a heavy linen thread for the sewing; one time self sewing with wool was quite enough. 35/2 black linen thread from Wm. Booth, Draper was used; it was lovely to sew with, and I recommend it.
Seams
My seam choices actually evolved during the duration of the project—I had started with a stab stitch for construction, and a backstitch worked from the right side to sew down the seam allowances. I chose these as a backstitch was referred in Henshall [Pp. 124][iii]. And so, the first few seams used that particular combination. Towards the end of the project, I was sewing the seams with a backstitch, and using an overcast stitch for the last seam or so (attaching the skirts, I believe). An overcast stitch was used for the hemming, since it is clearly visible in one of the photographs. The bottom and front hems of the skirts are all double turned, with the second turning barely under—this was according to the report, and collaborated by my observations. Plus, that way the cuts for the pinking wouldn’t have an extra layer of fabric in them. Contrary to the report[iv], the center back verticals got a single turned hem (and no pinking on the edges)—I saw no evidence of the pinking and double turn there in the photo below.
For the most part, I used the same seam choices in the Mark II as for Mark I; the exceptions are the in hems, which only got a single turn this time around, since the fabric was much thicker. The other exception was in the felling of allowances, where I switched to an overcast stitch; this choice was made because I felt it would give much cleaner results than the backstitch I used the first time around.
The other (more minor) difference is that I used a backstitch for my main construction stitch, rather than stab. This change was made because I had found in a prior project that backstitching (given thin enough fabric) is quicker than a stab stitch, and just as (or more) strong, although not as pretty on both sides (at least when I do it).
 |
| from The Dungiven Costume |
However, the way I attached the skirts was slightly different from the above. The underskirt was sewn on with a backstitch—nothing interesting there—but the topskirt was attached with an overcast stitch. Looking closely at the images (seriously—it was eyestraining) you can see that the topskirt lies flat and neat, and the seam allowances went to the top of the seam. You can also see that the bottom skirt was hemmed in one with the front of the doublet, and that the topskirt doesn't quite go all the way to the front edge. A experiment with scrap fabric showed that the following was the way it was accomplished:
After sewing the underskirt on, I folded the skirts and body wrong sides together, then overcast the folded edge of the topskirt to the body (right sides together). The edge of the topskirt was basted down for sewing, but otherwise no fastened.
 |
| My experimental seam to apply the topskirt neatly. |
 |
| And with what would be the topskirt folded back. |
Patterning and Drafting
I used my standard method of finding the measurements. A few were given in the article—notably the front length. Armed with that information, I took a tracing of the diagram given in the paper. Rather than going off of the tracing I just took, like I normally do, I measured directly from the computer screen to avoid the inaccuracies in my tracing.
I divided the front body measure (inches) by my measurement of the corresponding spot on the pattern (in mm). This gave me my scale. I measured every point on the pattern and calculated the full scale measurements.
For me, it was almost the correct size already (I may be tall and slender, but have a short torso). But after adding in ease for the eventual linings and my fencing shirt, I had to make it about 10% larger. I multiplied all of the horizontal measures by 1.1 to get my full measurements, but left all vertical measurements alone.
However, I discovered that the armscyes weren’t as deep as the image shows—after pondering, and sharing the image on Facebook for second opinions—we decided that the bottom of the scye was about 2 inches higher than shown.
 |
| My Pattern. If you look closely, you can see both the original and my scaled measurements. |
The sleeves were fairly simple. I took the proportion and calculated the width and curves as above. I made the length as needed for my arm length, and the cuff a modest three inches to just partially cover my hand. The cuff has a slight curve to go with the flare.
Here, I had issues in the Mark II. I found that--quite simply--my measurements didn't add up on the paper. No matter how I did the math, I ended up with a body 2-3 inches wider than the 44" it should have been...one of the most frustrating issues I have run across in my sewing this year, since I knew what it should have been, and it just wasn't working. Long story short, I ended up retaking all the horizontal body measurements you see in the photo above so that they would actually end up totaling the desired 44" (original measure plus 10%, remember)chest circumference. What this means is that the Mark I ended up being 3 inches larger in the chest than it should have been--I strongly suspect that this was the reason the Mark I armscye had to be gathered to fit the sleevehead.
The sleeve, and skirt measurements required little changing, although I probably should have widened the entire sleeve--it fit perfectly into the armscye, and Henshall said that there is some gathering in the top back of the sleeve cap, which pulls the mostly "c" shaped sleevehead around so that the seam runs down the back of the arm.
The collar was an issue; the back collar ended up having to be a fair amount wider than the proportions requested, so I waited until I was ready to sew it in to draft it.
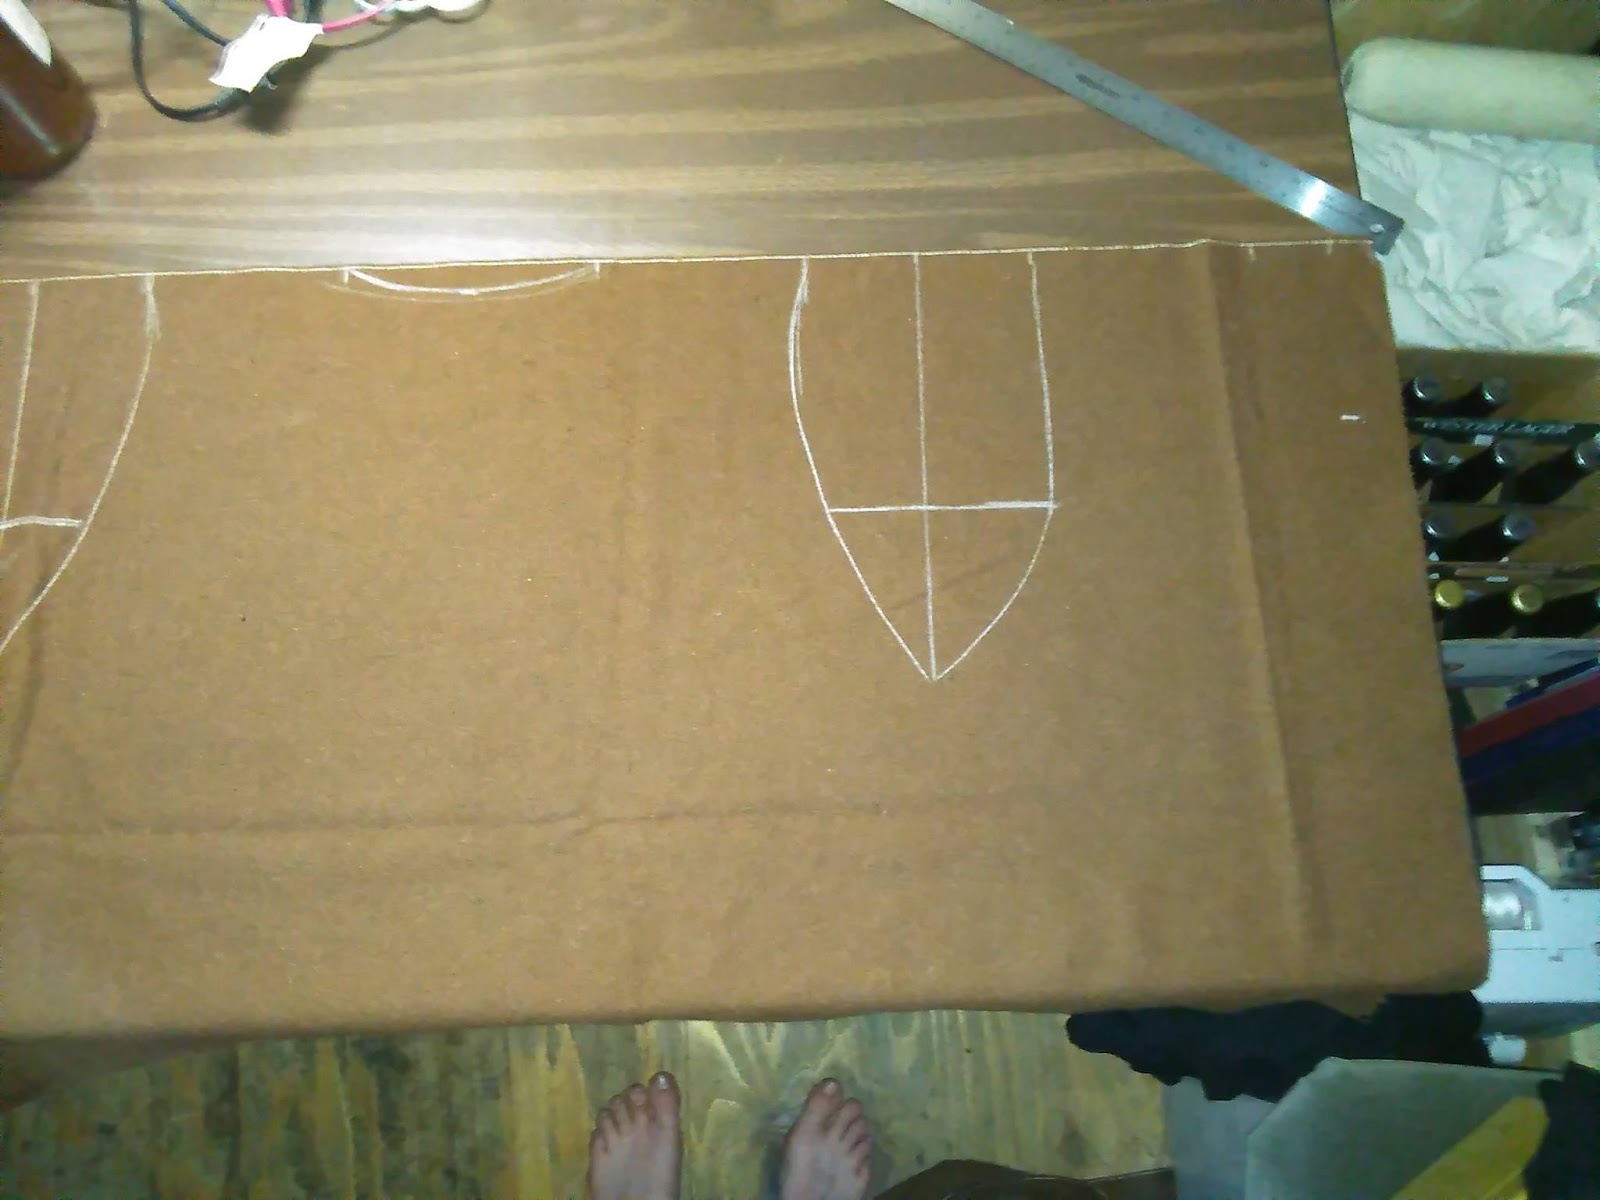
Cutting Layout
The cutting layout is fairly simple. We already have the selvage at the shoulder, so we know that the torso was cut from the width of the cloth. The cutout curve at the bottom was likely used for the buttons, which were cloth. The sleeves are apparently cut from the “width of the cloth”—they do fit, easily. The skirts are too long to fit in the width, unless my measurements are off (which I don’t believe they are), or the fabric was a few inches wider than the body height supposes (also entirely possible). The collar and gusset can fit in almost anywhere.I used the curved cutout at the bottom of the doublet as the source for my thread, pulling them one at a time.
Construction
I didn’t make it as efficiently as I could—ideally, the majority of the work would have been done while the body was flat, sewing the shoulder seams and setting the sleeves in at the last. But, because I always am concerned about the fit, I did things the hard way.
 |
| Laying the pattern out on cloth. |

 |
| Mark II pieces cut. |
1) After making my pattern, drafting out the measurements, and cutting the body from my wool, I stitched in the back gusset.
 |
| Back gusset. Ugly, ain't it? |
 |
| Much better. I learned. The heavier wool helped some, but I also curved the top of the slit where the gusset was inset. |
2) Following that, the collar was sewn on, then the shoulder seams. The piping was sewn in one with the construction seams.
 |
| The three pieces of the collar, neatly labeled so I wouldn't lose track of what goes where. |
 |
| Stitching it in place. |
 |
| The first shoulder seam has been sewn, in one with the collar seam. |
3) After sewing the cuff on the sleeves, I found issues sewing the sleeves in—the armscyle is larger than the sleeve. I ended up gathering the armscyle slightly—Henshall did note that there was gathering at the scye [Henshall pp. 124], but not whether it was the sleevehead or the scye. Odds are, it’s an unknown, given the condition of the area. Being as I stand by my measurements, I went with gathering the scye. After sewing it in, I found that the gathering gave me a close sleeve, as well as excellent freedom of movement—especially for the kind of movement needed to draw a bow. I used heavy linen thread to do the gathering, and removed it after sewing.
The skirts were hemmed, then sewn in place.
Because I knew what I was doing when I made the Mark II, the skirts were sewn on right after the back gusset (rather than waiting to check the fit of the sleeves). I did use the same seam as before to attach the skirts (underskirt sewn with a plain seam, and overskirt whipstitched to the body over that), however, I hemmed the front of the underskirt and the front opening of the garment in one go (further along in the project).
 |
| Back side and bottom are hemmed. |
 |
| Bottom skirt applied. |
 |
| Using an overcast stitch to apply the topskirt. |
4) The front opening was hemmed, with a close double turn. Following that, I inserted the collar lining. This was cut to the same pattern and fabric as the outer collar. I stitched the two layers of piping into the collar, staggering them so that one would stand taller than the other. The collar lining pieces were sewn together along the verticals, laid in place, then the top edge was turned under and overcast to secure. The edges of the front opening were turned towards each other and stab stitched, and the bottom edge was left raw and overcast down.
 |
| Collar lining pieces sewn together. |
 |
| Closeup of the finely felled seams on the collar. |
 |
| The collar lining laid in place. The piping was sewn on separately, then the lining sewn to that. |
5) After a fair amount of pondering, I decided to make the buttons in the same way as medieval cloth buttons—the paper does just say that they were round knobs of cloth. So I took my squares, gathered them and shaped them into spheres. [Carlson]
The cuffs also got hemmed at this point
 |
| Buttons, buttons. Who's got the button's? ....I DO! |
6) The buttonholes were also done in the medieval style, given that the description given was “roughly overcast”. Rather than neatly measuring the distance between holes, I decided to eyeball it—I feel this is most likely how it was done in period for this garment, given that the buttons and remnants were slightly uneven. I started out sewing them with a true buttonhole stitch, but shifted to a simple blanket stitch after a few buttonholes in; I found that the unplied self thread was breaking too often with the amount of friction from the knot.
Medieval buttonholes were sewn fairly simply—just a simple slit with the edges bound in a buttonhole stitch. There are no bar tacks on the end, and they are often worked from the wrong side. Typically, though, there is a facing of silk or linen to reinforce the outer fabric. In the late 16th century bar tacks appear and the stitching is much neater. [Frey, sections 1-2]
 |
| Macro shot of the buttonholes worked in self wool. |
 |
| More buttonholes, at the collar. |
 |
| And at the waist. |
 |
| Bottommost done correctly this time. |
 |
| Yup...buttons. |
 |
| The sleeve cuff. |
8) The last step was to snip the skirts and piping. It took a bit of staring at the images to determine which way they went—it seems that the way the cuts run is not bi-laterally symmetrical, but mostly goes around the circumference. Even the shoulder cuts go along with that. The two rows of piping at the top of the collar are cut in opposite directions to form a “herringbone”.
 |
| Fully buttoned, and the skirts snipped. |
 |
| It was not intended to be quite centered (the skirts are...the gusset is not). Looking closely at the image of the center back, I feel it looks something like this. |
 |
| All the snipping on the collar and shoulders. Note the slight herringbone effect at the top. |
Conclusions
My conclusion is that it is indeed a house made garment, rather than one made by a professional. The lack of structure in the form of linings and interlinings, the unevenness, the fact that the sleeve caps don’t fit the armscyle…all point to the roughness in manufacture.
Dating: As I noted in the section on the find—there is no known specific dating for the garment. The original thought for dating is that it could be from anywhere from the later 16th century to the 1640s. Looking at normal garments for a variety of periods, I believe that the 1630s and later is out, based on the shape. We do see doublet bodies with that shape (straight front and pointed) as early as the 1590s and running through the 1630s [Arnold]. The skirts, however, are problematic. I have not found any paintings with the two layers of skirting, and deeper in the front. But, you do see those high waists, deep fronted skirts, and shoulder wings on narrow sleeves…in the 1620s. The two buttoned cuffs also work for the period, although you can see them in the 1560s, as well [Arnold pp. 53]. Therefore, I believe that the 1620s may be the correct time period for it—based on period pieces of artwork, and the small cross section of garments in Patterns of Fashion. This does not, however, include however long it may have taken fashion to reach Ireland (assuming the clothing is from there to begin with). I would also like to bring up a quote from a Frenchman who traveled to Ireland in 1644—de la Boullaye le Gouz—that they wore “a jacket with a long body and four skirts”[v].
 |
| Clothing of Gustav Adolf, 1620s |
NOW—all that being said, if you look in the Images of Ireland, by John Derrick (1581), you can see interestingly long skirted doublets. And doublets which have somewhat pointed waists. While I normally do not care for Derrick’s work—I feel it is more a work of political fiction than of truth—I do believe that he is more accurate with the English and Anglo-styled clothing.


 |
| All three from Images of Ireland |
Thus, my verdict is that….we still cannot tell when it was made. We will not know for sure until carbon dating is performed on the garments.
What I Learned:
The main thing was the best way to deal with self sewing—sewing with thread pulled from the same cloth as the garment. I found this to be one of the most difficult parts of making the garment. Unfortunately that is all I can really recall, other than practicing my stitching and scaling process—I did take notes, but they were lost in a computer crash. Upon wearing it for the first time, I realized that the bottommost button (the one halfway down the skirts) serves the purpose to keep the skirts overlapped neatly.
What I would Do Differently:
I would use a backstitch from the start, and make the seam allowance of the piping narrower. The main thing is that a moment’s oversight messed up one of the buttonholes—the bottommost buttonhole on the doublet body is supposed to be slanted, following the bottom edge. I got distracted and cut it straight. If I were making this garment to wear (inspired by, rather than trying to replicate), I would likely also make the sleeve head wider so I don’t have the puckering at the armscyle.
I did implement these changes in the Mark II; a backstitch was used for the majority of construction, the piping seam allowance was narrower to keep down the bulk in the seams. I remembered to make the bottommost buttonhole slanted. And because I fixed the sizing issue I didn't know I had, the sleevehead fit the armscye correctly (although I should have made the sleeve wider to give the gathering specified at the back of the arm).
I believe I do prefer how the Mark I came out--the collar is more graceful and closer fitted, for one; I ended up making the Mark II collar too high, by not using wide enough seam allowances (1/2" was calculated, and I didn't quite use that. Plus the piping added more height than expected).
I do still intend to add the post construction linings and facings, but those are not part of the original garment.
Cost:
I will start by estimating the cost if it had been made by a tailor—a skilled labourer. At 4 pence a day [Leed] (assuming an average of an 8 hour working day, although it may have been longer) you would be looking at 1s 8p for the labour of the garment—a week and a half of labour or more for a farm worker, or 2-3 days for a common soldier. It could, of course, be less—and likely was. Assuming it was made by a professional, a country “tailor” or especially his apprentice would be making and selling it for less. Also remember that at the time, tailors were not the ones who sold the fabric—in the case of a “bespoke” garment, the fabric would be purchased by the buyer. This, of course, does not factor in the cost of the wool.
I am still tracking down those costs for the period of the garment. However, I can say that the price of a second quality woolen from Cambridge (using the cheapest option I can find) in 1520s was around 2s 6d per yard [Munro pp. 69]. Which just goes to show that in period materials were expensive, and labour cheap—still the opposite of today (mostly).
At modern wages, even on the extremely low end for Knights of the Thimble (told you I was going to use that!), it is around 450$ US dollars in labour and materials.

Historical Sew Monthly Information
The Challenge: December: Re-do.I am redoing the Challenges for Practicality (May), as this is an extremely plain garment, suitable for labour; Out of Your Comfort Zone (June), self sewing (sewing with thread pulled from the cloth) is well outside my comfort zone--it's a pain. And, of course, The Colour Brown (pretty obvious)
Fabric: A 100% wool.
Pattern: Taken from the extant garment and the archaeological sketch from the '60s.
Year: Unknown--sometime between 1570 and 1640.
Notions: None.
How historically accurate is it?: Materials are 100%, construction is as close as I could make it, given the lack of information. 98%?
Hours to complete: 39 hours, 45 minutes; give or take a couple hours. As said, I lost my notes in a crash, and had to go by my memory.
First worn: Not yet.
Total cost: Unknown. I didn't use more than two yards, and I know I didn't pay more than 15$ a yard.
Historical Sew Monthly Information (Mark II)The Challenge: March 2016, Holes. There are a fair number of holes in this garment--21 handsewn buttonholes, plus all of the pinking on the hems and piping.
Fabric: A 100% wool.
Pattern: Taken from the extant garment and the archaeological sketch from the '60s.
Year: Unknown--sometime between 1570 and 1640.
Notions: None.
How historically accurate is it?: Sadly, this time around I consider it less accurate. The fabric is wool, but the use of a plaid (especially a shadow plaid, which was popular in the 1950s, I'm told) is not for this type of garment. I also used dyed linen thread for construction--while the use of linen thread is period (although not for a reconstruction of this garment, since wool was specified), I am not sure if there is documentation for black dyed linen thread (there might be, by this period). I'm going to give it around 85% this time around (compared to 98% in Mark I)
Hours to complete: 26:54 hours. Much shorter than last time, probably because I wasn't sewing with wool--didn't have to fight the thread.
First worn: Not yet. Have to make the trius from the find as well, first.
Total cost: Fabric was 10$ a yard (ish. plus shipping). Less than two yards was used.
EDIT: This garment was Stolen from a friend's vehicle on the evening of 1-7-15, in Concord (San Francisco Bay area) California (along with the other contents of the suitcases). If you happen to see it, please CONTACT ME. I figure it's a long shot, but doesn't hurt to put it out there.
 |
| Showing off the freedom of movement. Just....pretend there is a bow there, ok? |
 |
| Completed Collar front |
 |
| And back |
 |
| Macro of the underside of the shoulder wing. |
 |
| Right Shoulder |
 |
| Back of the left shoulder |
 |
| Back of the right shoulder |
 |
| Center back |
 |
| Inside of the center back |
 |
| Left skirt |
 |
| Wrong side of left skirt. |
 |
| Mark II Collar |
 |
| Mark II Collar back |
 |
| Outside of center back skirts. |
 |
| Center back inside. |
 |
| Back of the armscye, showing the sleeve seam and wing. Notice that the wing is much narrower than last time; this is, again, because of the mistakes in my math for Mark I. |
 |
| Front Shoulder. In person, the vertical striping isn't visible, and even the horizontal is barely noticeable. |
 |
| Yup, it's a buttoning cuff. |
Bibliography:
Henshall, Audrey S.. Ulster Journal of Archaeology, Vol. 24/25 (1961-62). Pp. 119-142Arnold, Janet. Patterns of Fashion 3 (1985). Macmillan Publishers
Carlson, Jennifer. Making Cloth Buttons. (http://www.personal.utulsa.edu/~marc-carlson/jennifer/buttons/Basicfabricbuttons.htm) [Accessed 12-22-15]
Frey, John. Buttonholes Throughout the Periods. (http://matsukazesewing.blogspot.com/2015/07/buttonholes-through-periods.html) [Accessed 12-23-15]
Nelson, Walter. Elizabethan Incomes (http://walternelson.com/dr/elizabethan-incomes) [Accessed 12-23-15]
Leed, Drea.Historic Tailor’s Wages (http://www.elizabethancostume.net/blog/a-tailors-wage/) [Accessed 12-23-15]
Munro, John H. Hanseatic commerce in textiles from the Low Countries and England during the Later Middle Ages: changing trends in textiles, markets, prices, and values, 1290- 1570 (https://mpra.ub.uni-muenchen.de/11199/1/MPRA_paper_11199.pdf) [Accessed 12-23-15]
Images:
Map: https://mapstor.com/data/map-previewf/de--me--500k/gif/de--me--500k--n29-no--%281940%29--N056-00_W009-00--N054-00_W006-00.jpg
1620s doublet: http://www.kostym.cz/Anglicky/1_Originaly/04_Barokni/I_04_26.htm
Images of Ireland: http://www.docs.is.ed.ac.uk/docs/lib-archive/bgallery/Gallery/researchcoll/ireland.html
[i] As it is referred
to by Marc Carlson.
[ii] “They appear to
have been straight and narrow with one seam towards the back” Henshall, pp. 123
[iii] “Sewing is by a
double or lightly plied woolen thread and the seams have been turned in once
and back-stitched.” Henshall, pp. 124
[iv] “The edges are
turned twice and hemmed;” Henshall pp. 123
[v] T he closest
contemporary description appears to be that given by the French traveller, de
la Boullaye le Gouz, after his visit to Ireland in 1644 during the period of
the Great Rebellion. He writes of the 'Wild Irish' menfolk wearing a small blue
cap covering head and ears, a jacket with 'a long body and four skirts'
(assuming this to mean two pairs of skirts split front and back as in the
Dungiven example, and not a single skirt divided at the hips as well as before
and behind), 'and their breeches are a pantaloon of white frieze which they
call "trews" ' (frieze is wool but there is no indication of tartan
pattern). 'Their shoes which they call "brogues" are pointed, with a
single sole. For a mantle they have six ells of frieze which they wrap round
the neck, the body and the head, and they never quit this mantle (either) to
sleep, to work or to eat. Most of them have no shirts.' He goes on, 'The Irish
in the North have for clothing nothing but a pair of breeches, and a blanket on
their back, without cap, shoes or stockings.'19 . Page 130, The Dungiven Costume. Henshall, Audrey S.
©
John Frey, 2015/2016. The Author of this work retains full copyright for this
material. Permission is granted to make and distribute verbatim copies of this
document for non-commercial private research or educational purposes provided
the copyright notice and this permission notice are preserved on all
copies. Photographs of my work may not
be duplicated.
Nice work! But stolen? That is the worst thing I could think of when it comes to my reenactment clothing. Even more so if the thief doesn't have a clue of the real worth of what he was stealing (i.e. steals for modern stuff). I hope you get it back!
ReplyDeleteIt was devastating for sure. Didn't work on anything for several weeks.
DeleteNot sending anything out of state for display again--if I'm a Queen's Artisan again, they can get a photo album....
I don't think my last comment posted properly. I just wanted to say, actually living in Dungiven and slow stitching my own clothes, this was a wonderful find. Well done, that was amazing.
ReplyDeleteThat is wonderful to hear, and thank you!
ReplyDelete