Doublets and Spiderwebs: A brief tutorial on 16th Century Thread Wrapped Buttons.
Updated with another style (Rib in) on 12-23-16
First off, there are several other tutorials and articles filled with photos of period examples out there...that's where I learned it from. They have decent information...but not very good step-by-step photos of the process--which is what I am publishing here.
The two articles I primarily made use of were one by Cathy Snell--her article on Making Buttons. It covers a variety of period button styles, with brief tutorials on self-stuffed cloth buttons as well as a number of different thread wrapped buttons. There aren't a whole lot of period images, and the photos of her work aren't the best (it is an older webpage).
The other is from Katerina's Purple Files webpage, and has quite a few different examples from period. The photographs and instructions for the process are much better, but still leave out steps. Go read it for examples, since I don't plan to cover that.
At the moment, I am only covering one style--simple, visible ribs; I should say here that (after publishing, of course) no period examples of the "rib out" wrap have yet been found. If you know of an example, please share in the comments! I would like to point out that I am doing one major thing differently than them, and using self-stuffed cloth buttons (links to two tutorials) as my base, rather than a wooden bead--the decision was made due to the depressing and despicable lack of wooden forms of the right size to be locally found. In all honesty, I suspect using a cloth base made things much easier--the ribs didn't really slip.
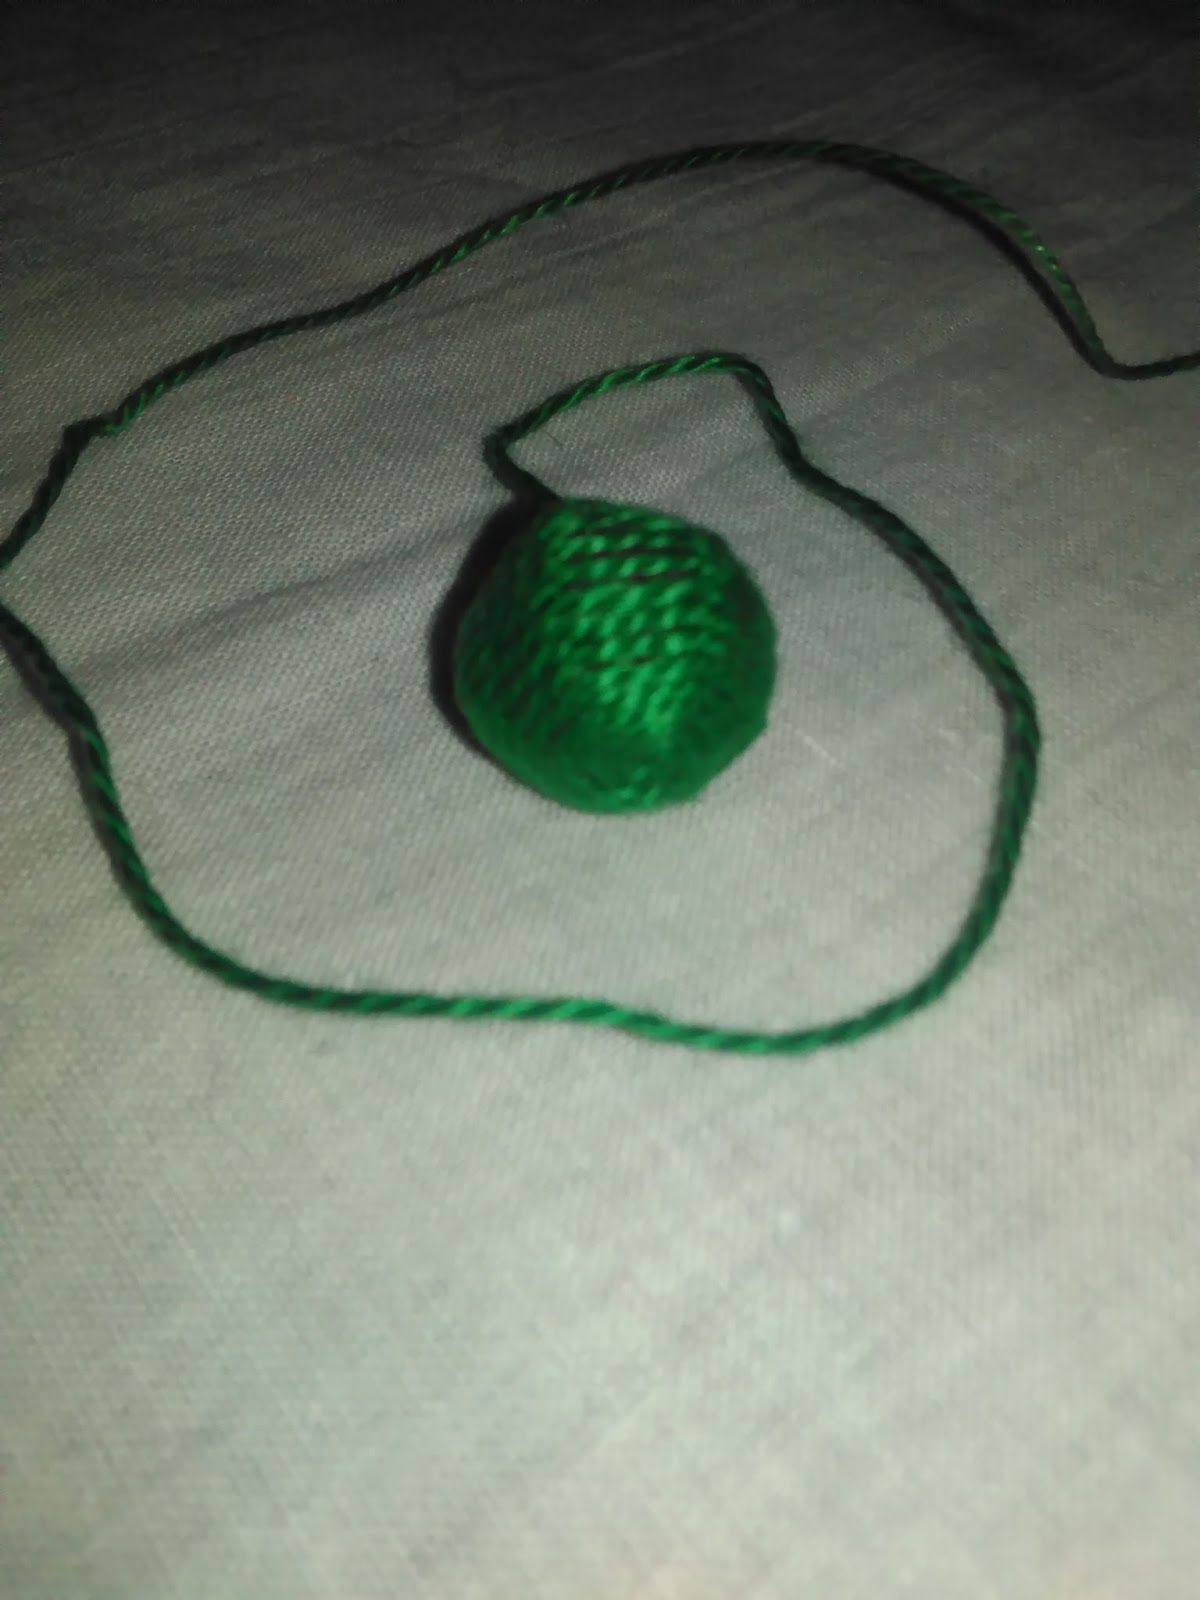
Visible Ribs
After making and fulling my woolen button form, I knotted the end of the shank thread, and pulled it through the center of the form.
Wrapping around--a large whip stitch, really--the button and re-entering at the center bottom. It is important that you make sure the needle enters and exits in as close to the exact center on each wrap.
After forming your however-many ribs--as you can see, I went with six--take another stitch back down through the middle so that this thread exits at the center bottom. Clip the thread down to around 18 inches to make the shank later.
When forming the ribs, remember you don't want to pull them tight, just snug enough to keep them in place.
And for the actual stitches to cover it: Knot the end of another thread and take a single stitch through the center of the blank. At this point, I'm using a blunt tapestry needle since we'll not be going through the fabric. You will probably come out slightly to the side of dead center--that's fine, just make it close.
Take a stitch under the rib immediately behind where the thread comes out. I should note here that I am left handed; I was working clockwise. If you are right handed you will likely be working counter-clockwise.
Take a stitch under the next rib and loosely pull tight. Tension is important--you don't want it too loose, but if you pull too tight you will shift the rib.
Continue going around and around until the button is completely covered. I found that after the first couple of stitches, I could do the wrap and go under the next rib with a single stitch; I kept my thumb on the wrapped rib to keep it in place while pulling the stitch snug and against the prior row.
Until you round the equator of the button, you can shift how close the rows are in order to even things out--so make sure that you make the adjustments then (to help prevent the bottom from ending funky).
Once finished, you have a couple choices. My preferred way to end the
thread was to tie it in an overhand knot to the shank thread, then take a
stitch through the button and come out the side, where the thread was
trimmed close.
Thankfully, the very base of the button won't be particularly visible when worn... Each button took about 30 minutes to cover, and is about 15mm in diameter. Perl cotton was used, silk would be more period.
Ribs In, the more period basic button:
Start out with your base; as usual, I am using a woolen base and a correctly sized wooden bead would be more period. Run the needle with a good 2 yards of thread through the center; the more ribs you have, and the larger the bead, the more thread you will need. Leave a small tail.
If you are using a woolen base, as I am, it is important to get this as close to possible to the center.
Go around to form the first rib, reinserting the needle through the center hole.
Do it again. I like to go in fourths first, to help keep things even.
Repeat again and again, until you have the desired number of ribs. Make sure you only pull them snug, not tight.
Now to begin actually covering the buttons; remember that I'm a lefty! As a lefty, I'm inserting the needle under the rib left to right, and working around the button counterclockwise. If you are right handed, the needle will go right to left, and working clockwise.
So, work the needle under your first rib, coming out below the stitch, and gently pull it taut.
Move to the next one and repeat. If you need to adjust a rib because it's not quite even, you can tug the working thread slightly in the right direction.
Keep going, in a nice little spiral....
Just keep stitching.... Note that one of the advantages of using a woolen base is that I can catch a few fibers with each stitch, keeping the stitch and rib where I want them.
Ok. Here it's done. Those last few rows are usually a bit fiddly, and I don't always get every stitch in there, since some of the ribs are quite close--just cover the base as best as you can. To tie off the thread, I just run it under a couple of ribs across from each other....
....wrap like I'm making a half hitch or buttonhole, and pull it tight.
Essentially, they are done, although many period examples also have a small bead or knot on top. Some also have vertical wraps of contrasting thread going between the ribs to form a cross.
And the video tutorial! I'm getting a little better at them, although still not great. The video also shows you how to smoothly restart a thread if yours breaks or you run out.
Web Covered Buttons:
For
the second type of Elizabethan thread wrapped button, I decided to go
with a style based on the decidedly web-like ones on page 43 of PoF.
This isn't the only place they show up, but is the first one I spotted.
The
style is worked over a wooden core (again, I used a woolen core because
of the availability...or lack thereof...of wooden beads of the right
size), with a black silk velvet covering, and a web of black silk
threads over that. As usual, note that there may and probably are
better ways to get the desired finish, especially since the method I
used didn't get as close as I would have liked.
Needed for this project are:
Wood or woolen button blanks.
Circular blanks of the covering material. A fine silk is probably best.
Stout thread for gathering.
Floss for the covering.
Tapestry needle.
Jewelry pliers, if you're unlucky.
To
start with, make or buy your cores. If you are using wood, it would
probably be a good idea to drill out the center a bit, since you will be
packing a fair amount of thread in there.
Covering
the buttons really isn't difficult, but I will go over it anyways.
Essentially make a row of gathering stitches around the perimeter of
your covering fabric (cut in a rough circle as above). Place your
button blank in the center, with the bottom up.
Pull
the stitches closed to gather the cover around the button blank. It
won't fit perfectly, and that's okay--it'll be fixed in the next step.
Tightly
wrap the stem a couple of times to cinch the covering down tight. You
will then run a number of stitches back and forth, tightly against the
bottom of the button to anchor the covering.
Snip the stem of the blank, as close as you can without loosing stitches.
After
cutting about two yards of your floss, knotting the end, and digging
out a tapestry needle, stab (force...) the needle through the dead
center of your button blank.
It may help to use a leatherworking type awl to start a hole if you are working on a woolen base as I have.
Pull
it though, and repeat, running the needle through the center to form a
loop. Pull it taut. Unlike the last button style I covered, you will
want it to be tight enough to help prevent shifting. This is your
foundation thread.
Now to actually begin your covering, which is done in this case with a detached buttonhole stitch.
In this case, the buttonhole stitches are worked on the foundation
thread. The stitch itself is worked much the same as your normal
buttonhole--wrap the thread around the needle the way you usually do,
but making the stitch rather loose. You will want to anchor it with
your thumb where you want to put the next foundation thread.
A
finished row of 3 stitches. While the period thread did use more,
keeping them fairly close, I felt my thread was too thick to allow the
red ground to show through if I did so. After you finish the row, run
your needle through the center to anchor it and set up for the next
stitch.
Remember, every time you do so, you want to use the same hole, especially in the top.
Repeat
to make the next foundation thread. Keep it in place with your thumb
as you pull it tight. Again, you will be wanting the thread to be no
further than you gave room for in your the buttonholes of the last row.
For the next row, you are going to go under both the foundation thread you just laid, and the previous matching buttonhole.
Wrap
per normal, and loosely pull it tight. Oxymoron? Maybe, but that is
what you need to do. The knot itself needs to be taut, but the stitch
should be a loose loop.
Again,
repeat, running the needle back through the center, twice; once to
anchor and get the needle where you want, then to form the next
foundation thread.
Continue the process of making foundation threads and covering them with loose buttonhole stitches.
When
you reach the last one, and the button is almost covered, you will not
make a foundation thread. Instead, you will use the original, first
thread.
While
you can do a buttonhole stitch as for each other row, I decided to do
so slightly differently, since I felt it gave the most regular result.
Run your needle under the foundation and buttonhole loop, and use the opposite side to form a blanket stitch. Pull it loosely
Alternately, you can run your needle under, then come around and pick up the fresh stitch between the two vertical threads.
When
you reach the bottom for the last row of stitches, you will notice that
there is a nice ridge of thread over the center. To lock your thread
in place, run it under the ridge on one side....
Then under the ridge opposite. Draw it tight in a centered buttonhole stitch.
Finished
buttons. They are in two colours because the top four buttons
(probably the only four, really) on the inspiration for my jerkin are
contrasting gold.
And for fun, the video version of the tutorial. It was my first attempt at doing this kind of thing, and I learned a lot while doing so.
p.s. If you liked this article and are curious about other covered button styles, I also have a tutorial on the later Georgian style of fabric covered buttons, common to the 18th century.


Those are so cute! (And as another leftie, it's great to see a tutorial I don't have to mentally mirror. :) )
ReplyDelete