Showing posts with label Sewing. Show all posts

Thursday, October 20, 2016

A Robe for Reading: 1760s Banyan. I suppose I need sleeves, don't I?

And it's time for Part Two of Three on the making of my Banyan, based on an example from the 1760s in the Los Angeles County Museum of Art.  As you might guess by the title, the majority of this post is on drafting the sleeves--the cuffs and collar are both quite simple.

For a recap, this particular garment is based on the one the LACMA provided a lovely pattern and information on.  However, while they provided a pattern, they do not tell you how to draft the garment so it fits you (their scaling grid is also terrible).

The way I do sleeves is fairly simple; essentially you take the measurements of the armscye, and transfer those to your sleevehead.  However, a word of warning that some parts of sleeve drafting--the hang of the arm in particular--are rather complicated, and something you will have to learn on your own (until I get good enough that I can explain it); when it comes to the lateral rotation (as swinging your arms normally) you want the top and bottom of the sleevehead to be in line with the natural hang of your arm.  As such, it may not hurt to mark the low point while the body is on your victim as well.

Sunday, July 24, 2016

The HSM 2016; Challenge No. 8: Patterns

The Historical Sew Monthly challenge for the month of August is Patterns--all the varieties of patterned fabrics, and the garments which feature said patterns.  A vast subject, as I found when I volunteered to write this inspiration post--I mean I knew it was large, but this is almost ridiculous.  I will be doing my best to include things for everyone, and barely touching on the history of individual patterned fabrics.

Late 13th Century Lampa brocade.  Italy.  V and A

Friday, January 1, 2016

Projects of 2015, a Review

I didn't get nearly as much done as I would have liked last year--I had major motivation issues.  I found that when I work on a single project, I tend to maybe work on it for a couple of hours at a time, then set it up, having gotten tired of it--which really isn't too productive.; which means, when I have a project that takes a couple of months, my total number of projects goes down drastically.  I can say that I finished a couple of major projects, at least.

This year, I will try the opposite--work on multiple projects at a time, with varying (or no) deadlines, and discuss my planned projects for 2016 (although planned is such a strong word...hoped for would be better).  But to start, I will go over everything I remember making this year.


A pair of Norse shoes, based on the Oseburg 303s.  They look terrible.  In part this is because of the leather, but also because I made them for winter wear--to wear over multiple layers of socks--so they are somewhat loose.
11 hours of construction time, and many, many more patterning.

Tuesday, December 15, 2015

Historical Sew Monthly 2016--An Optimistic Plan

Edited: 3-15-16


Every year I attempt--somewhat--to follow the Historical Sew Monthly (or Fortnightly, when it was every two weeks).  For those who do not know, the Historical Sew Monthly is a sewing challenge.  12 historical sewing projects (cut off is 1938), due on the last day of each month; each has a different theme chosen by the sponsor and popular vote (to some degree), and it is up to you to come up with something--anything--sewing/costuming related that somehow fits in.  This year, there is a particularly nice lineup, which may actually help me get it done--I think there is only one which I'm looking at with no idea.


The main post on the Historical Sew Monthly can be found HERE.  Read it, or else.

Wednesday, December 9, 2015

14th Century Kolpak

Today I'll be going over my process and some documentation for my kolpak.  Sadly, this project was a couple of years ago, and I didn't take full notes on my documentation.  Shame on me, I know.

When I made my 14th century Russian garb (lovely period, btw.  Quite comfortable, and warm) I needed, of course some kind of headwear.  Preferably one which wasn't commonly seen...this mostly left a tall kolpak.  I really don't feel like writing an article--when Sofya la Rus has already done so, and better than I can.  So go read HERE...I'll wait.

Well, they seem to have "typically" been made of a stiffened felt--not an option for me, sadly; I don't have the materials to do so.  So I went with a logical variation--using birch bark as a stiffener.  I figured "birch is common in Russia, and was used for some things, so why not" (I seem to recall a collar stiffened with thin leather or bark).

The first order of business was to pattern, figuring out the circumference (head, plus some ease for the fur), and the height.  I then drafted a slightly asymmetrical shape that I found pleasing to the eye.  Note that the curve to the bottom is necessary.

Tuesday, December 1, 2015

Franken-frock Coat: It's Aaaliiive!!

Almost...done.  When I last last left, I was discussing the pockets, and mourning the fact that I apparently did not take any pictures of the semi-complete garment.  So, an overview it is.

To recap, my Frankenfrock is a frock coat made of 11 different wools, patchworked together; all of the shell materials were upcycled from blazers I purchased at the thrift store.  When I designed the garment, it was partly because I wanted a unique coat, and partly for the challenge of pattern matching and forcing myself towards precision in sewing my seams (the other option would be making a quilt...which just doesn't appeal to me).

Friday, July 10, 2015

Installing a sleeve vent

One of the things I found when I went to make my first couple frock coats is that there roughly no tutorials on exactly how you put together the vent on a working suit sleeve.  So, during the process of stitchripping over a dozen assorted blazers for the Franken-frock project, I paid attention to how the sleeves were constructed.  I'm not saying this tutorial is the only way to do it--or even the right way--but it'll work.
    None of them had working buttons, of course, but the construction is close enough--the main difference is in the lining.
   
 Alright.  Your sleeve pieces should look approximately like this.  When you draft, you need to add enough length to double up on the vent.  If you didn't, you can always sew on a piece to be the facing.

Thursday, July 9, 2015

Latest project, Unveiled. The Franken Frock (coat). Part I

Most people already know about this--it's not exactly a secret--but I have not officially announced one of my latest hare-brained schemes.  Since November I have been gathering materials, and am finally beginning to work on assembly.

A single breasted Frock Coat, based theoretically on the 1870's patterns (mainly the lapel shape), in a patchwork of tweeds I am upcycling from blazers found at the thrift store.  I have affectionately dubbed this project as my "Franken-Frock".  I've seen a few examples of patchworked coats, and personally have found them all to be hideous, with large pieces of material used in random places.  In comparison, part of the point of this project is to force myself to higher accuracy in stitching, since if I don't the pattern will get slightly askew (i.e. Let's challenge myself with pattern matching).

Friday, May 1, 2015

1370s Blue Cottehardie. HSM: April - War and Peace.


The Project:
This project is a men’s cotehardie, from the 1370s.  I wanted a garment which would work equally well for outdoors (“hunting”) and for less formal functions—not court clothing, but certainly not low class, either.  It is somewhat more modest in length than the average for that time—however, as you can see in the German Effigy, not everyone wore garments which showed off the majority of your legs.

Base Sources:
              I based the garment on several illustrations from the period.  A couple illuminations of soldiers (or one soldier), and a German effigy.  I don’t believe there actually are any finds of this kind of garment, beyond the Charles du Bloise pourpoint[i] (which is a silk gold brocade).

BNF Nouvelle acquisition française 15939 Miroir Historial (Vol 1) Folio 122r

Wednesday, February 18, 2015

Sture Suit: Finally (almost) Complete


Project:
              The full project will be a head-to-foot German renaissance outfit, patterned on the extant suit of Svante Sture.  All in all, this includes a doublet, pluderhosen, shoes, netherstocks, a hat, and probably a belt of some sort.  This documentation will only discuss the doublet and pluderhosen.

The find:
               The find this project is based on is the suit that was being worn by Svante Sture at the time of his murder on May 24, 1567.  The suit was saved and placed in Upsala Cathedral by his widow Marta.  The suit consists of a black velvet doublet and pluderhosen, trimmed with a greenish-grey silk.  The puffs of the pluderhosen were of the same fabric.  Overall, the outfit was fairly moderate—suitable for an older gentleman, or my more subdued taste.
The full suit. (From Patterns of Fashion 3, by Janet Arnold)
              
Pattern:
              The doublet is a fairly simple form of construction—single piece back (integral back collar), front pieces, sleeves with an interesting cap, shoulder wings, and a single piece peplum.  I chose to leave off the shoulder wings—in the first attempt at making the doublet I included them…then decided that I really did not like how they feel and look.  There were also a couple of pieces inset into the side, presumably to accommodate for weight gain—I left those out as well, because—while contemporary—they are believed to not be original to the pattern.

Saturday, January 31, 2015

Historical Sew Monthly, January: Foundations


Being worn without an outer layer--I was rather cold...


For the first entry this year, I have a simple undertunic.  Those who know me, know that I tend to play in early medieval Northern Europe, so this was a much needed addition to my wardrobe (all my old undertunics died.  Horribly).  I threw it together a few days before an event, once I remembered that I would need a new one, and did the hand finishing (sewing down the yoke and cuffs) in the car on the way to the event, as well as late that night while partying.

The pattern is simple—two body pieces seamed at the shoulders (it would have been one long one, but I wanted the stripes running lengthwise on the garment), two sets of gores, and two trapezoidal sleeves.  The gores were made approximately as wide and long as I could.  I may stitch rip, then inset gussets in the underarm at some point in the future.

Monday, December 1, 2014

14th Century Women's Hood: Documentation

Finished Hood.

Garment Description:
This piece is a 14th Century woman’s open hood, in a style appropriate for the early to mid 1300s.  This style of hood—rather than pulling on over the head as earlier and men’s versions do—buttons up the front, allowing it to be worn open in warmer weather, often folded back.  It is a fairly standard liripipe hood design—fairly fitted and having a short mantle, with a tail (the liripipe) running from the back of the hood.
 

The find and sources:
I decided to not duplicate a period piece for this project.  However, much of my inspiration came from the London Hood, which I patterned the construction off of[i].  In addition, some of the dimensions (most notably the circumference of the hem) and construction is from the Greenland find.  While mid century examples tend to be shorter and tighter than earlier ones, I also took the colder climate into consideration—upon discussing this project with another apprentice--, I tried to design the hood so that the mantle would cover the neckline of the recipient’s dresses in cold weather.
 
 
Pieces of the Garment:
The construction is fairly simple, being only four pieces (times two, if you count the flat-lining).  These consist of: the main body, which is roughly rectangular, with pieces missing for shaping (removed from under the chin, and rounding in at the back of the head); two gores which are set above each shoulder; and a liripipe.  Looking at period examples[ii] you can see that the liripipe is usually cut as a separate piece from the main hood.
 

Monday, June 16, 2014

Pluderhosen: Some assembly required

Pattern Traced from Patterns of Fashion, by Janet Arnold.

Continuing on from my last post--A Road To Madness--I believe I managed to rectify my mistake, by extending the dart into a seam going the full width of the piece.  This will result in the back panel being slightly shorter (around 1/2 inch, since I'm using as small of a seam allowance as I may), but that should be acceptable---that piece 1/2 inch shorter than it should, should not be noticeable.

Here, you can see the modified dart (left) and the original plan (right).

Wednesday, June 11, 2014

The (A) Road to Madness: Take the exit marked...Pluderhosen?

Over the last two days I managed to fully assembled the Sture doublet, with two major differences off of the original: It untrimmed (for now.  Strips of silk will eventually be applied), and I left off the shoulder wings because I quite honestly do not like the things--I don't like drafting them, I don't like wearing them, and they add a fair amount of thickness to the seam (at least with these fabrics)
There were a few issues in the making up, with ease (which was remedied once I got the bright idea to measure off of my existing doublet), mainly.  These were summarily overcome, and all that is left is the hook and eyes (and someday trimming)


But that is not what this post is on.  This particular post is on the Sture Pluderhosen, a maddening pair

Monday, June 9, 2014

Sture Suit: Thoughts on restarting.

Coming back from the Three-Barons Renaissance Faire this weekend, I got the...urge...to have a new suite of clothing for the second weekend.  The best bet, of course, is my shameful example of an UFO--an UnFinished Object
......My Svante Sture Suit.
Source: Patterns of Fashion, by Janet Arnold

Tuesday, May 6, 2014

And other Things: plotting a Transitional Frock Coat.

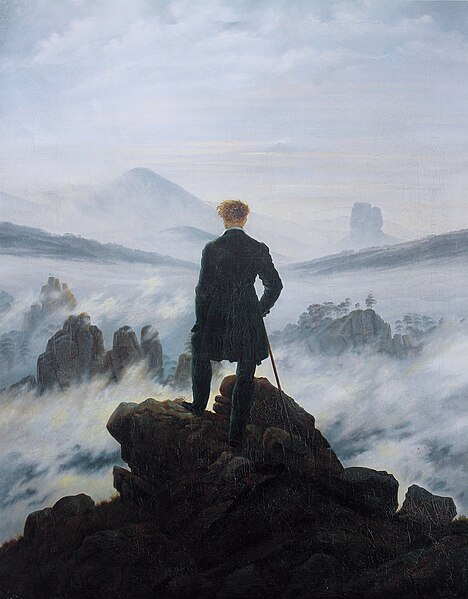
Historically Accurate?  No, not so much.  I do, however, need an outlet, where I do not have to worry about documenting nearly everything.  Steampunk(ish) things are that outlet as--even if there are no local events--I can wear the clothes daily without attracting stares (more or less, anyways).  In this case, while watching the 10th Kingdom, I noted one of the coats being worn by Wolf--a shortish (low thigh length) frock coat, in blue velvet or corduroy (no good screenshots available).  Of course, this immediately got my gears grinding, whether I wanted them to or not.  In addition, I ran across this image...


Wanderer above the Sea of Fog.  1818.
I just discovered this painting, and love it!

Monday, May 5, 2014

Norlund 78, or D10606 Hood: part 2...Mockup

Warning: Contains far too many numbers.  Continued from Part One


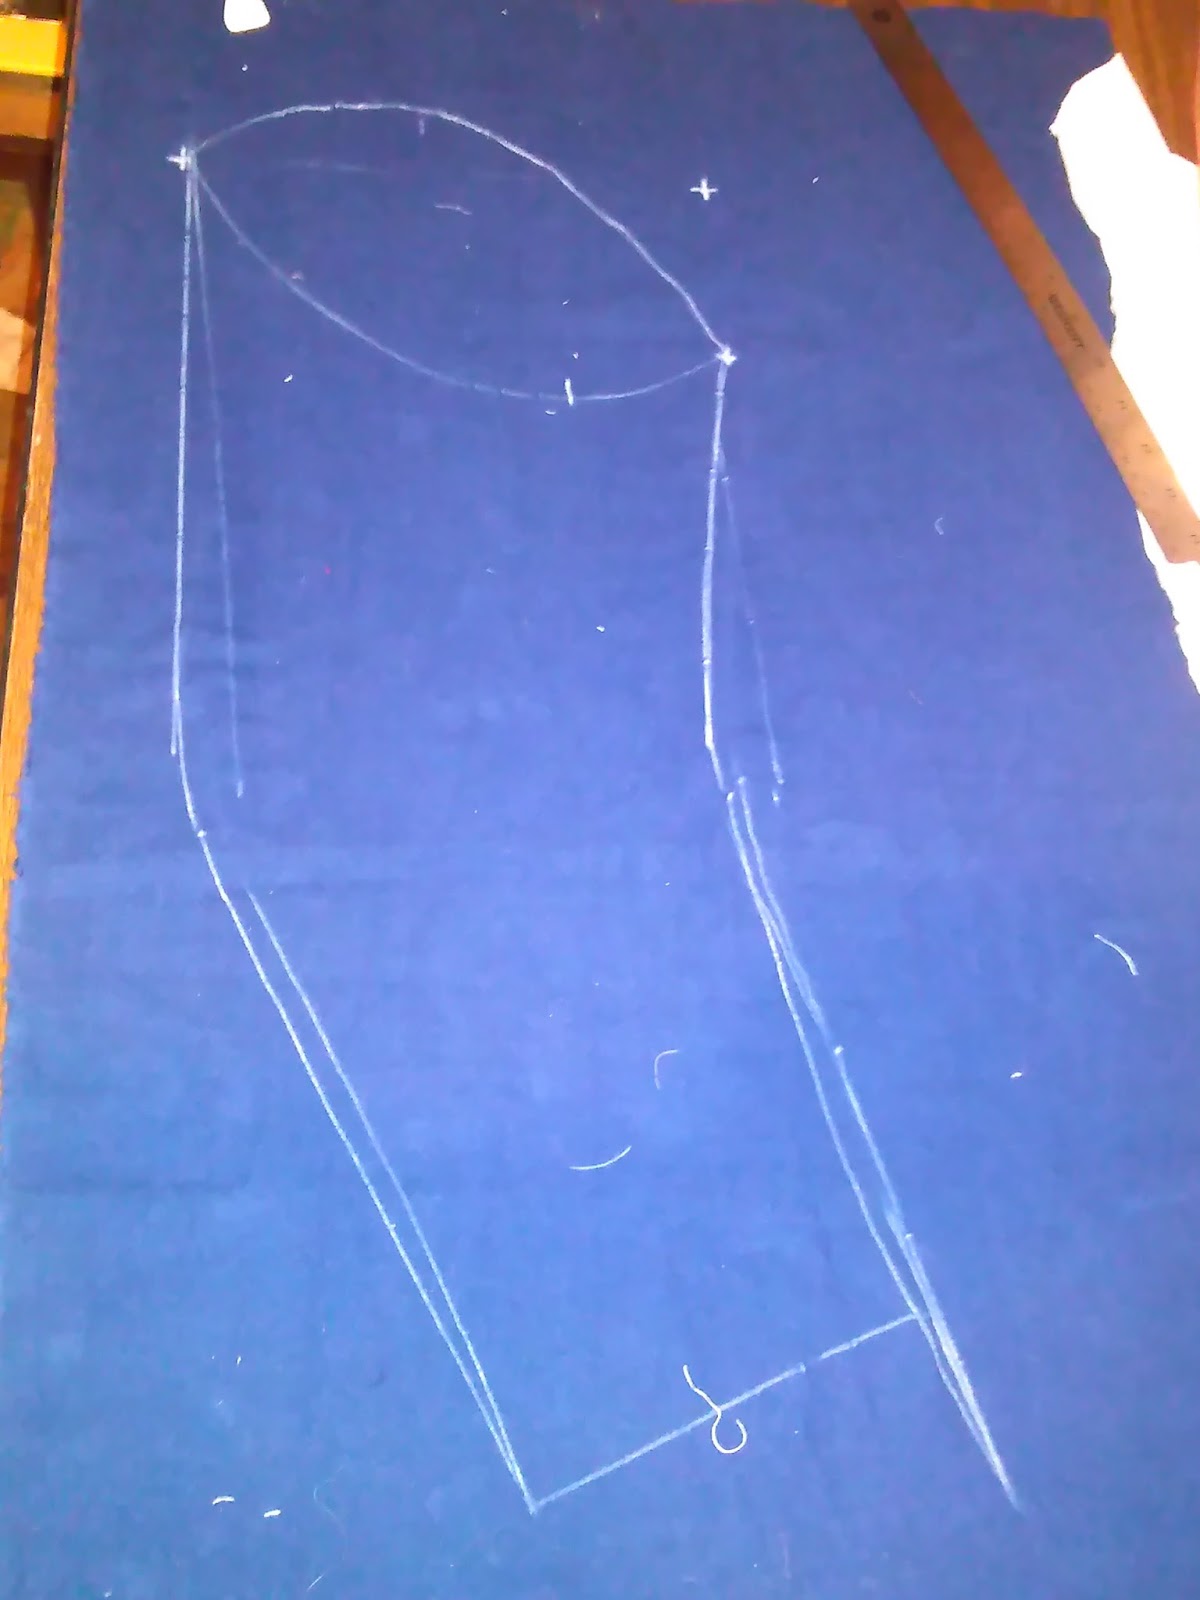
With the rough pattern figured  out, it was time to draft out the full scale mockup.  I decided that the best way to do so was to start with a straight base line, to the left of what would become the pattern, measure to the right from that, and essentially connect the dots.

Edited to add, at 11:33 5-5-14


The process was to draw a straight line, 405.9mm long (the height of the hood, plus the extra little bit for the "horn"). 
320mm from the top, I made a mark 15mm from the line--this is the chin, where it slanted in slightly.  Another 95mm in, beyond the chin, another mark was made, and the two points get connected (as does the front opening of the hood).
Going back to your baseline, at the bottom I marked in by 45mm, and connected slantwise to the mark above.

Thursday, May 1, 2014

Norlund 78, or D10606 Hood: part 1...First Draft

I woke up today with a project (two, actually) working through my head...one of the hoods found at the Norse settlements of Greenland.  This hood--labeled D10606--is a liripipe, Norlund type II. 

It has an extremely short cape, only a few inches wide, with the gores over the shoulder.  Unlike some examples from the main land, it does not button close to the neck.  The extant hood is 400mm tall (from hem to top seam), with a 695mm long liripipe.  The fabric, while now Bog Trash Brown (or a variant, anyways), was sewn in a vadmal which was light grey with a white weft.  The hood, like many of the ones found, rises to a "horn" in the front.  Norlund 78 is in excellent condition, with most of its original seams.


One of the first orders of business, once I decided I wanted to make this hood, was to figure out my fabric.  I found this far more difficult than I expected...first thinking of (and discarding the idea) using a beautiful light grey wool, interlined with a heavier grey wool--this was not a real option, since there is no evidence of D10606 being lined.  Following that was the option of a heavy wool in another colour (the same I used for my frock coat), or the light grey wool of an old army blanket.  Eventually, after much discussion with other artisans on Facebook, and some research into the dyes used in Herjolfsnes, I decided on the fabric below.
Monday, April 21, 2014

Huntsman's Frock Coat

Being interested in the steampunk genre, as I am, I decided one day I wanted to make myself a frock coat.  After browsing around the costumer's manifesto, with its scanned cutting manuals from the period, I found the Huntsman's frock coat pattern.
Made of wool melton, and lined with a plaid wool flannel (or supposed to be), it was a loosely fitting frock coat made for the Hunting master of a large Noble estate...and my brain started firing.  Here was a practical, working coat that I could wear, and I felt would make a good start to a Steampunk outfit.


I started off by drafting my pattern, as per pages 14-15 of the costumer's manifesto--the ones for the double breasted coachman's overcoat.  When you do this, read through the instructions very carefully, perhaps translating them into your own words; and when you actually draft, check off each step, before going to the next one.
 
Coachman's Overcoat.  Source link above.
 
I had to use this particular pattern instead of the one for the huntsman's coat because the planned coat has no information on drafting.  I did, however apply the ease as for the huntsman's frockcoat.
Obviously, I drafted it as single breasted.

Friday, March 21, 2014

Moselund Kirtle


The Moselund Kirtle


Top, Extant Garment; Bottom, My Reconstruction


Crafted and documented by Tiarna Bránn mac Finnchad


The Find
The Moselund gown was discovered in a bog 1884, in the Moselund Region of Central Jutland (Denmark), on a male bog body.  The body is stated to have been 180cm (6 feet) tall, and has been radiocarbon dated to between 1050-1155AD.  It does not seem like there has been much in the way academic studies on the findjust about every page I have found refers to Ancient Danish Textiles from Bogs and Burials by Margrethe Hald[1]. 
The original museum reconstructionsince the threads had dissolved and the garment was in all of its separate pieceswas as some kind of strange trouser suit with a matching cape[i].  In 1938-1939[2] it was re-examined and sewn together in its current configuration. 

Central Jutland
 
Description
The Moselund find is a tunic, corresponding to Nockert Type 2[i] or Nørlund Type Ic[ii], with front and back slits.  It is a fairly loose fit, though with close shoulders, and semi set-in sleeves (complete with S sleeve heads).  It appears to be mid-calf in length (approximately 49 inches in length, according to my calculations).  There appears to be little to no signs of wear before it ended up in the bog, with its unfortunate wearer.
It has been declared as the only surviving example of the blaðakyrtill (of the Icelandic Sagas)[iii].  Looking into the term, kyrtill does mean kirtlenothing odd therebut blað means leaf, blade, or skirt (of a kirtle).  Blaðra can also mean to flutter to and fro, which may be an apt description of the skirts of this garment when being worn in the wind or whilst riding.[iv]